
New Zealand - the perfect place to photograph the Milky Way - Part 1
a stunningly beautiful country on the opposite side of the world, viewed at night.
New Zealand Video
Don’t miss my video 'New Zealand - A Night Under the Stars', where I’ve compiled all my timelapse footage into one stunning final video. This video captures an 'entire night' in New Zealand, starting with timelapses of the sunset, transitioning to the rising stars, and concluding with calming timelapses of dusk.
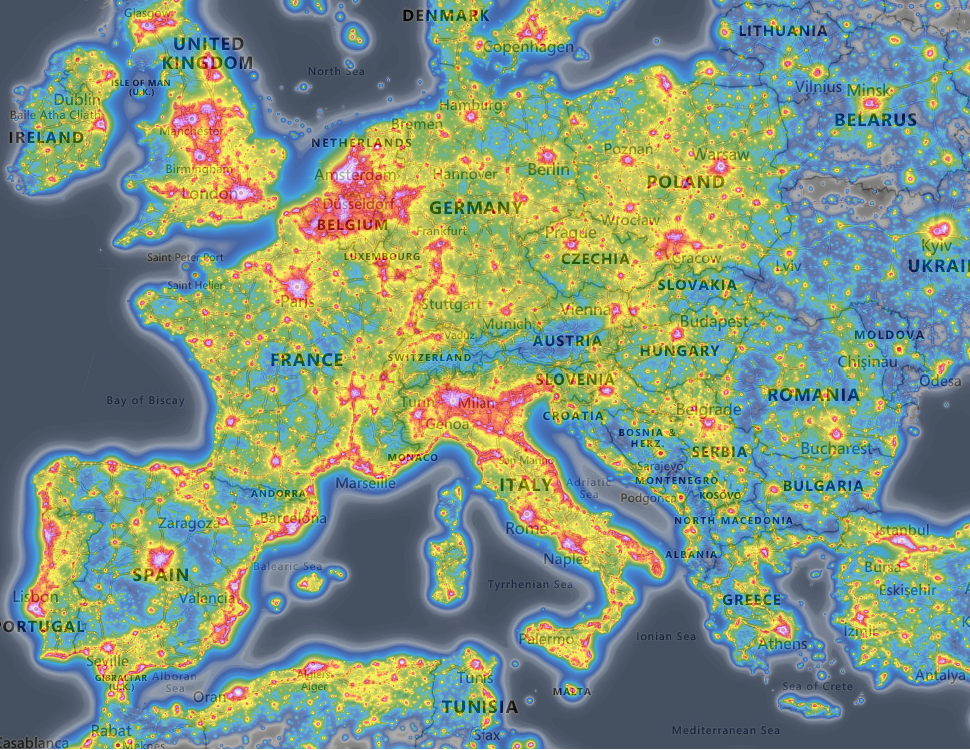
It's no surprise that New Zealand has been chosen as a filming location for numerous movies, most notably 'The Lord of the Rings'. Along with its unique volcanic landscapes, paradisiacal coastlines, and breathtaking mountains, New Zealand also boasts an exciting culture and a unique diversity of birds. New Zealand is also a place with unbeatably little light pollution. In addition, its excellent air quality makes New Zealand the perfect location for astrophotographers due to the relatively undisturbed view of the night sky.

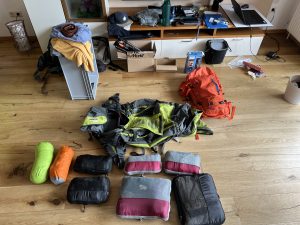
Our work-travel visa for New Zealand was therefore just perfect for us. In August 2021, my girlfriend, Laura, and I embarked on our journey to the other side of the world, after a slight delay due to the pandemic. I knew that I had to bring all my photography equipment to be able to capture all possible plans and visions. My luggage was excessively full, with much of it owed to the equipment. I had a mirrorless camera, drone, tripod, self-built slider, etc. It all adds up quickly. If you would like to know more details about our journey or what happened during the day, feel free to check out our blog.

Our highlights of the night
There are numerous locations in New Zealand that are perfect for capturing stunning photos of the Milky Way and the night sky. The list below is just a small selection of places that I found particularly appealing. I have personally attempted to take photos at each location and provided some details about each photo and location.

Positions and Visibility of the Milky Way
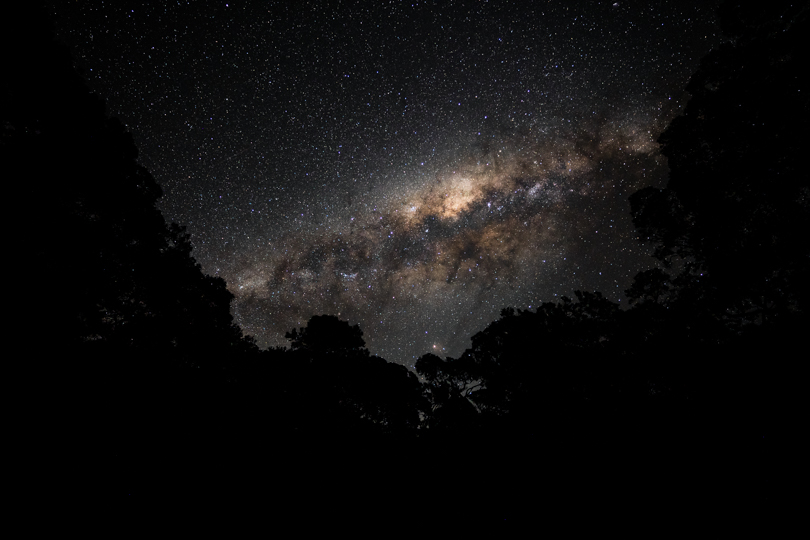
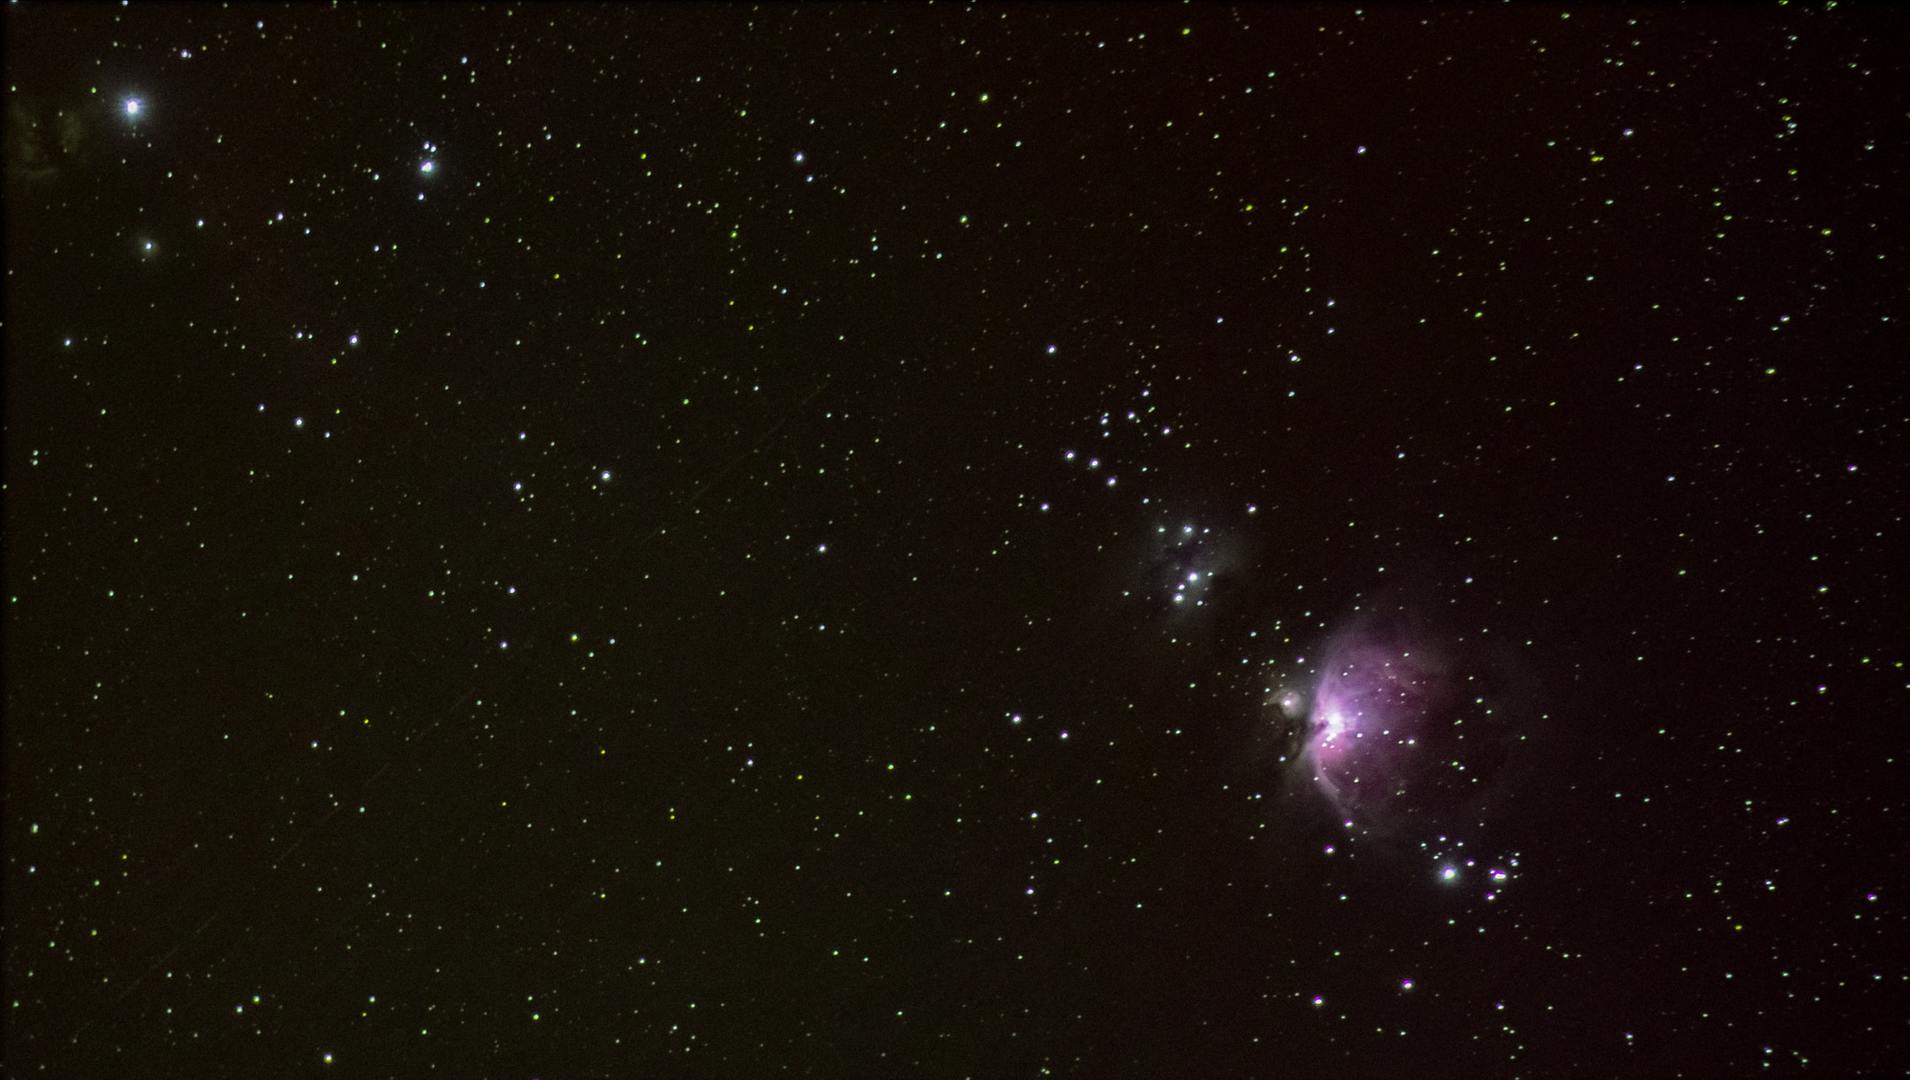
I'd like to briefly discuss the visibility of the Milky Way in New Zealand before I start with my list. Being located in the Southern Hemisphere, the Milky Way appears different in New Zealand compared to the Northern Hemisphere. Almost throughout the year, the Milky Way is visible in the night sky and can be seen all night long and high in the sky in June/July. However, towards November, it loses height, approaches the horizon, and is only briefly visible after dark. In December, the Milky Way disappears below the horizon after dark, making it difficult to find in the night sky. In January, it can be seen briefly before sunrise, and from February onwards, it becomes more prominent in the night sky again. When I mention the Milky Way, I am specifically referring to its spectacular core. In general parts of the Milky Way are always visible, they appear only as a subtle band. For detailed planning, I recommend using the PhotoPills app.

PhotoPills App: In January in New Zealand, the core of the Milky Way is hardly visible because it disappears with the sunrise.
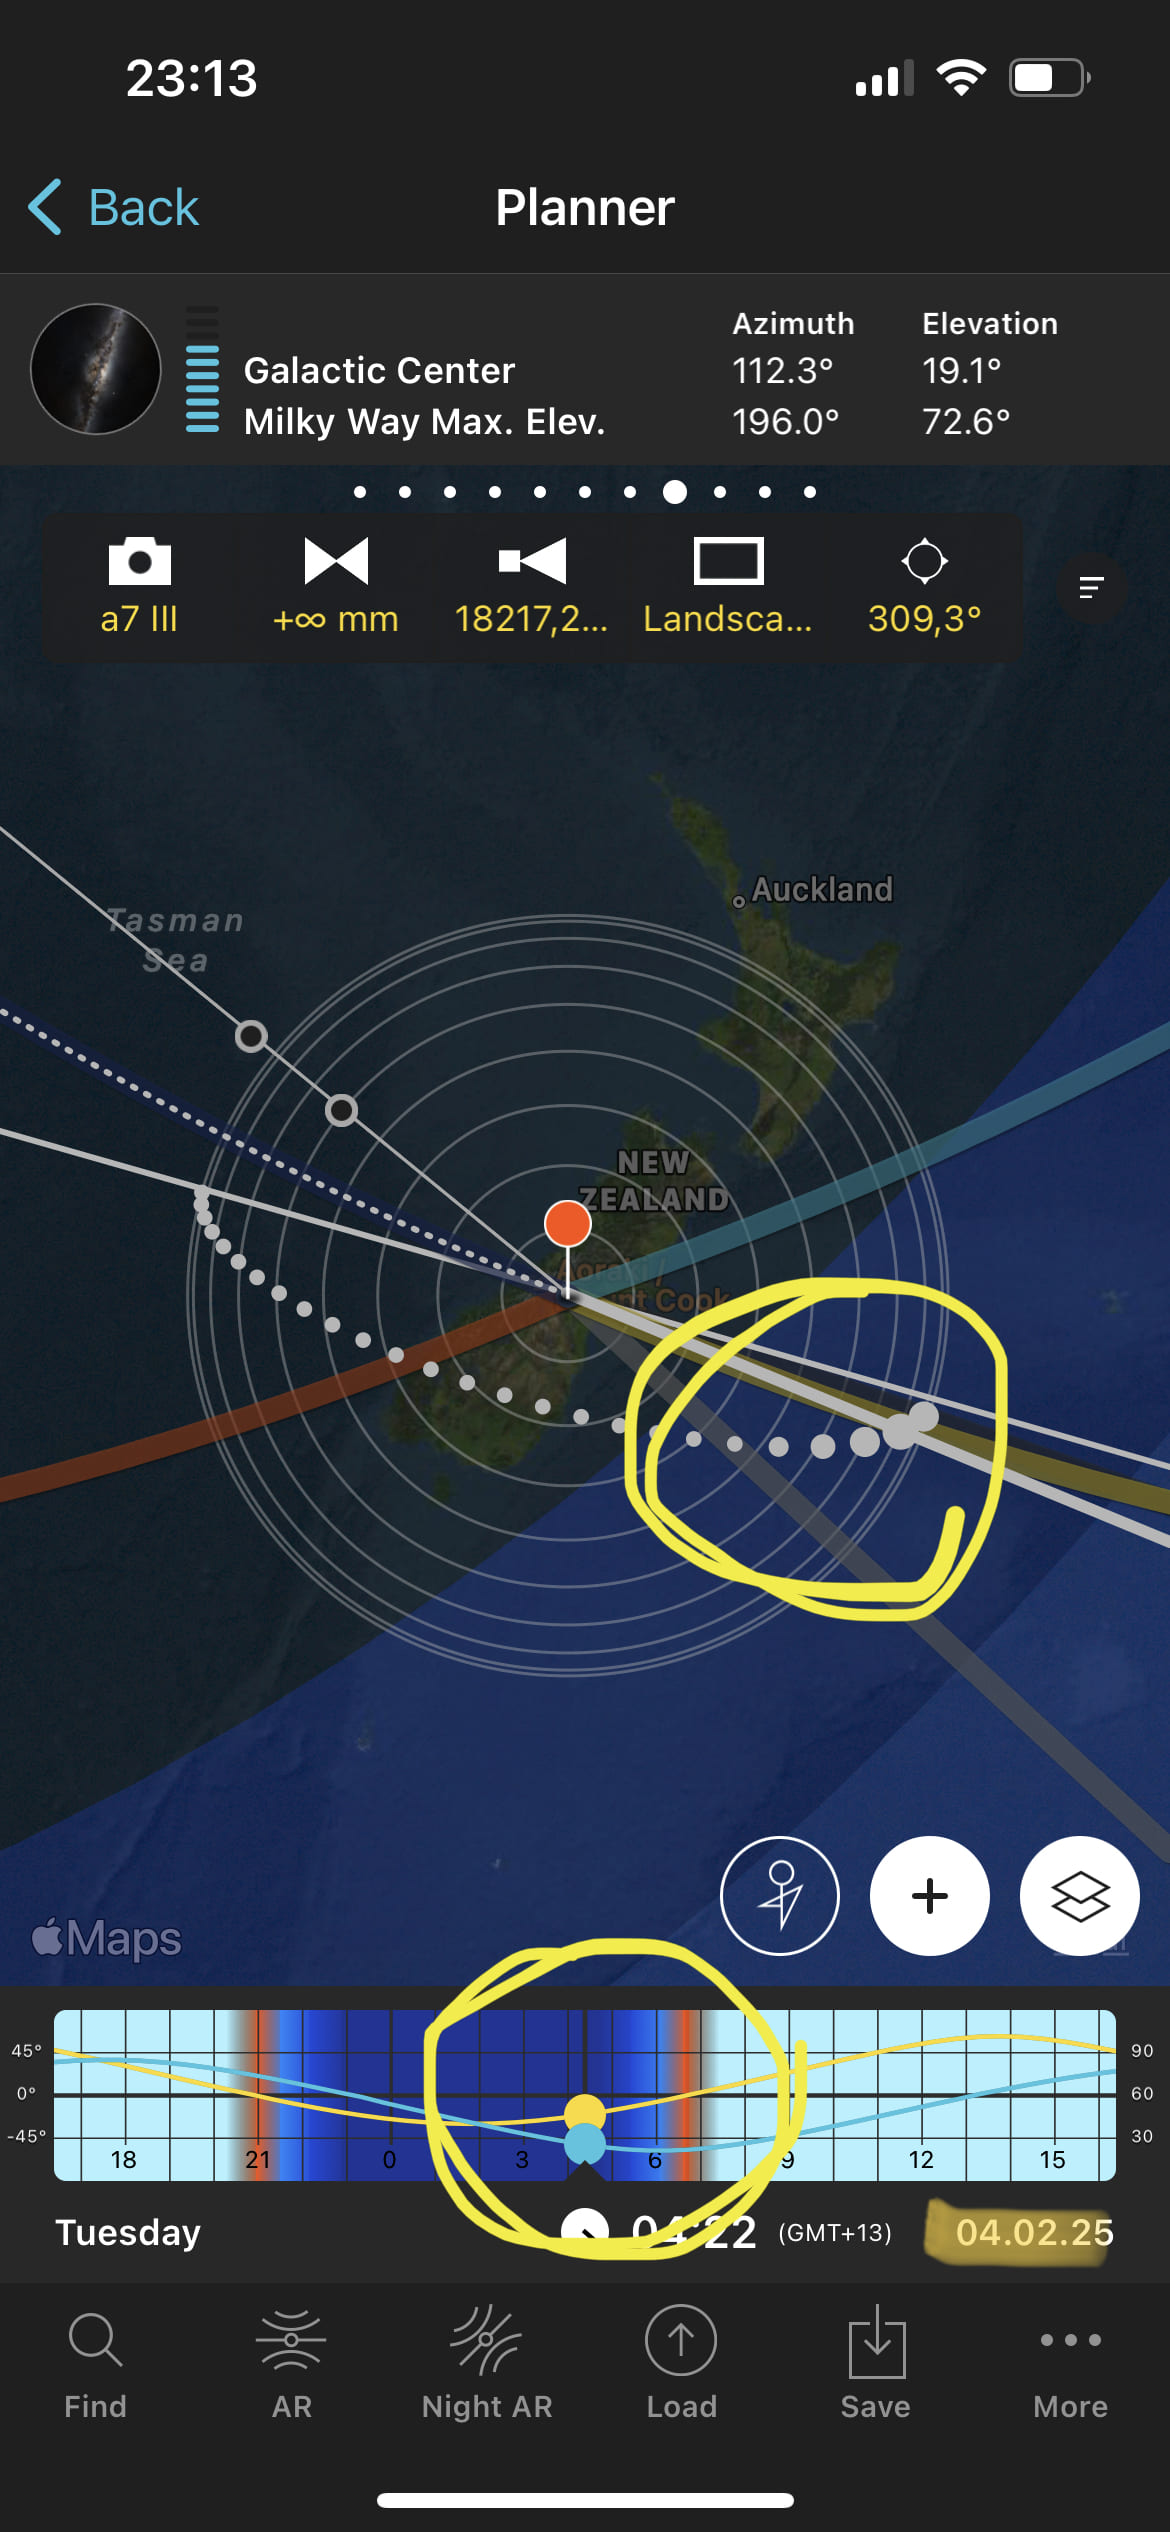
PhotoPills App: In February, one can see the core of the Milky Way rising just before sunrise on the horizon, but it also disappears with the advancing onset of daylight.

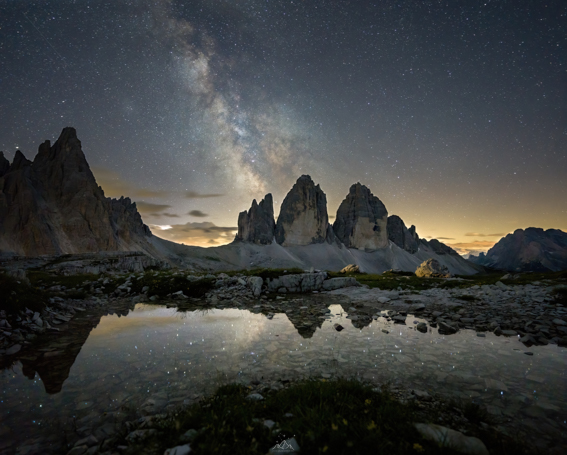
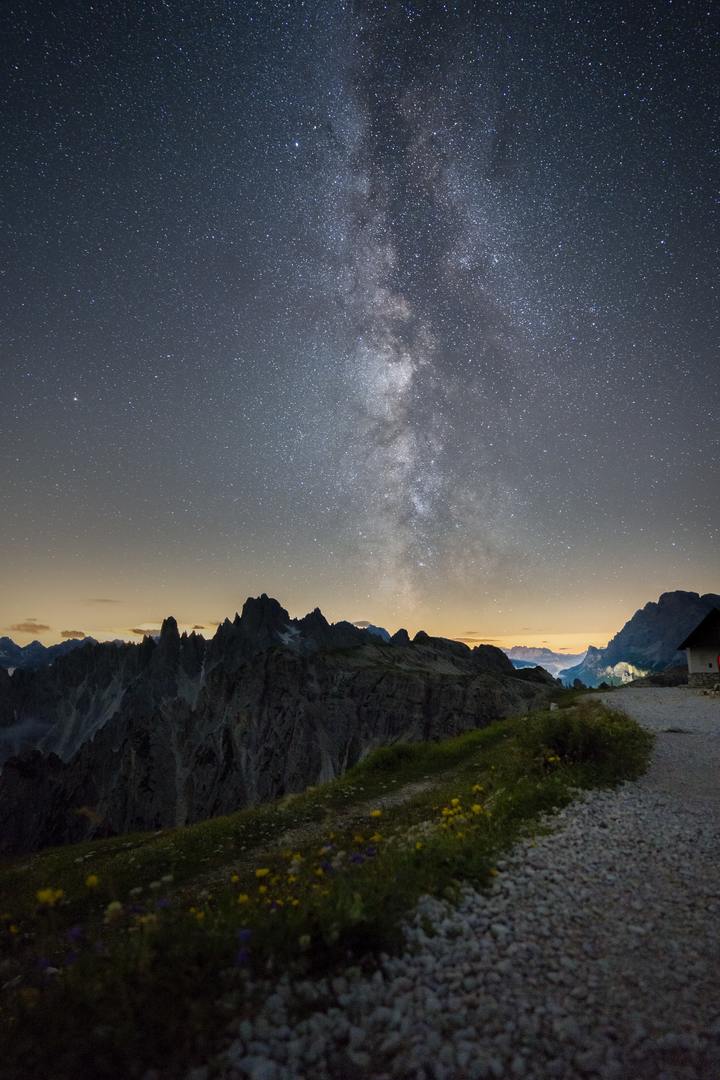
PhotoPills App: In winter in New Zealand (summer in the Northern Hemisphere), the core of the Milky Way is visible for nearly the entire night and stretches partly high in the night sky.
Piha Beach - Rain is coming
Piha is a charming town located near Auckland that boasts stunning coastlines and a striking black sand beach. The rugged cliffs and the magnificent Lion Rock are also famous attractions in the area. For surfing enthusiasts, Piha is a must-visit destination because of its impressive waves. Nature lovers will appreciate the numerous hiking trails in the Waitakere Ranges Regional Park that surrounds Piha. These trails will lead you to fascinating waterfalls, including the majestic Kitekite Falls, and give you the chance to encounter native flora and fauna such as Kauri trees and Tui birds. Despite its relatively remote location, Piha is easily accessible from Auckland, making it a popular destination for day trips or weekend getaways for both locals and tourists. Whether you are seeking an adrenaline rush or peaceful moments in nature, Piha promises an unforgettable experience on the wild west coast of New Zealand.

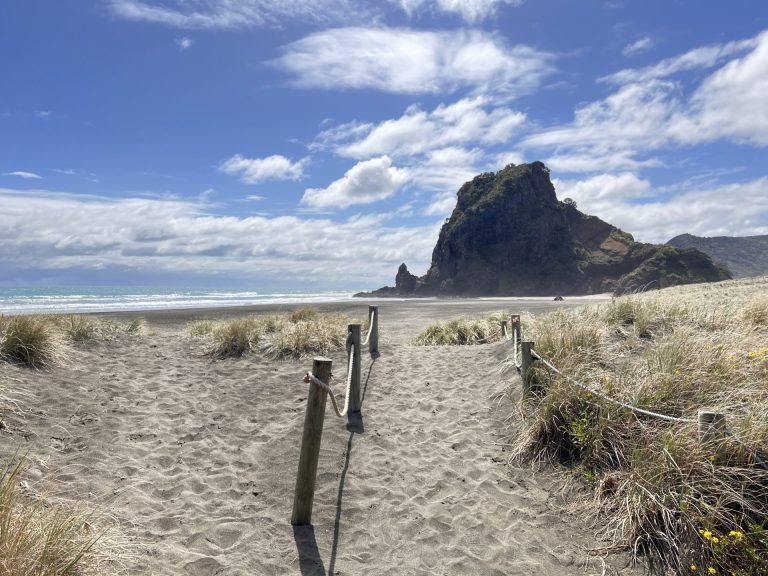

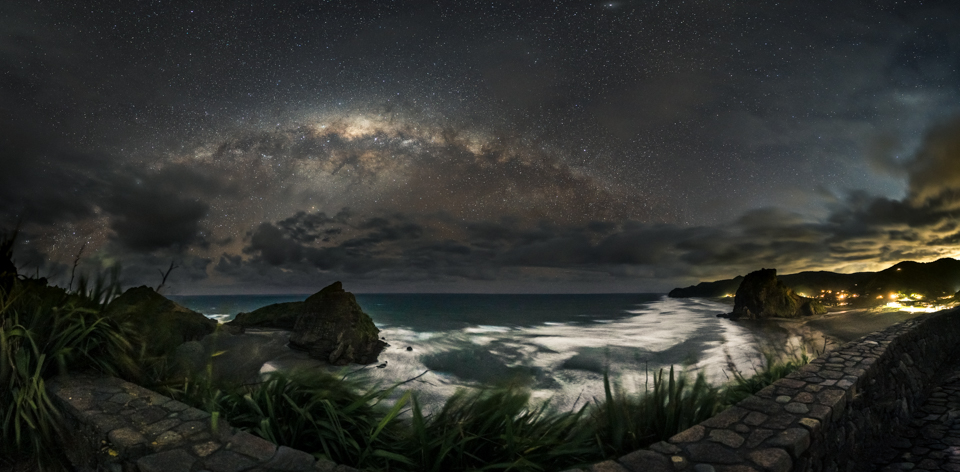
We were thrilled to visit a small town in October 2022 and capture its stunning coastal landscape under the night sky, even though it wasn't a new moon. We discovered a fantastic view of Lion Rock and Piha from a small viewing platform ('Tasman Lookout') near the only campground in the town. While waiting for the sunset, a thick cloud formation appeared, and it started to rain, which obscured the sky. We waited out the rain, protecting the camera, and finally confirmed that the weather forecast was correct, and we could capture a beautiful panorama of the Milky Way.
Note: There isn't really a supermarket in the town - so it's recommended to shop beforehand if you plan to stay longer.
The Milky Way from the Lion Rock to the Blue Pool at Piha Beach

Click to open image
Cathedral Cove - Not entirely alone
Cathedral Cove is a popular and picturesque bay located on the Coromandel Peninsula in New Zealand. This Cove is well-known for its stunning rock formations (especially 'The Hoho Rock') and white sandy beaches, making it a popular destination for both hikers and beach lovers. With its crystal-clear waters it is considered one of the most beautiful highlights of the region.
During our stay in the Coromandel region, we were naturally drawn to Cathedral Cove due to its beauty and popularity. We were fortunate to find a backpacker job and were able to explore the region on weekends. We had seen many reference images of Cathedral Cove on the internet, and were excited to visit and experience it under the night sky.

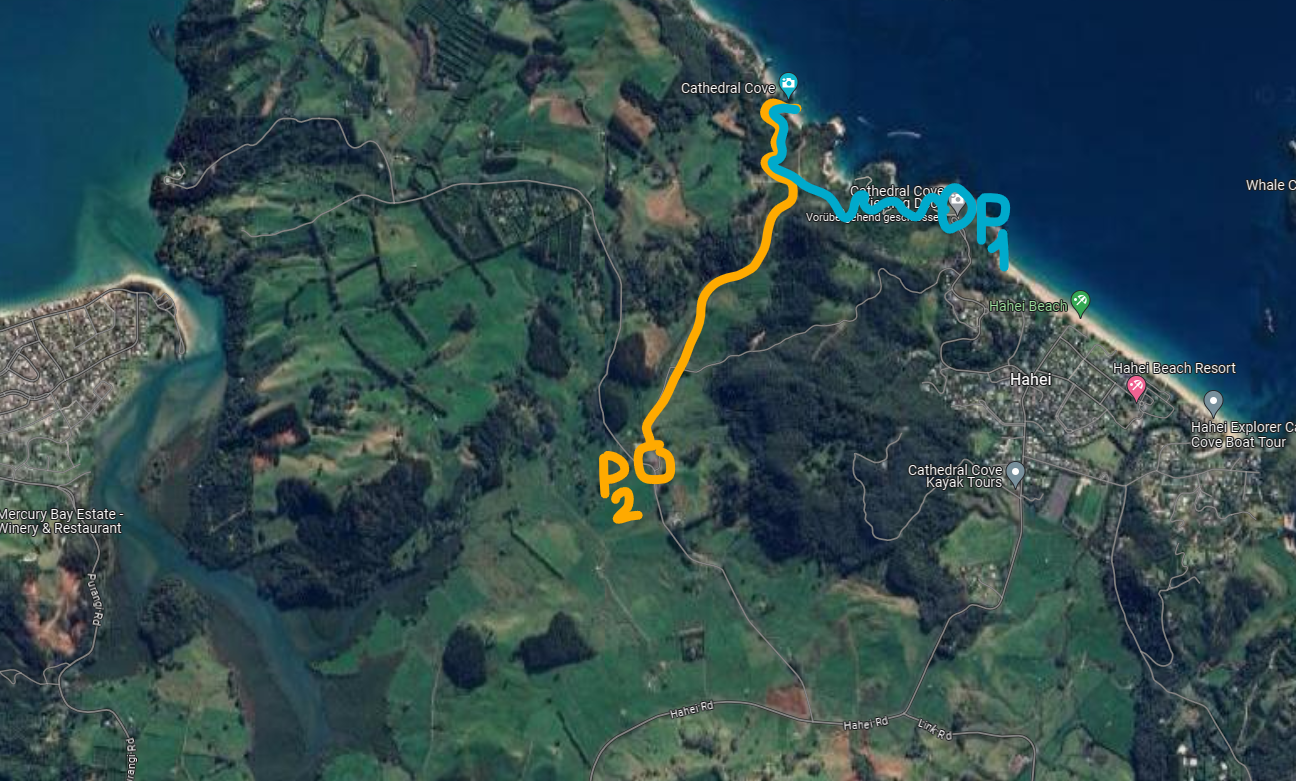

So, one weekend in September 2022, we headed towards Hahei. However, Cathedral Cove cannot be directly accessed by car but is accessible via a small yet beautiful coastal path. It's crucial to check beforehand if the path is currently open, as rockfalls and landslides sometimes partially block it. Also, it's important to avoid high tide, as it may prevent access to certain parts of the bay. Since we also wanted to spend some time in the bay after sunset, we opted not for the classic parking lot at the 'Cathedral Cove Viewing Decks' (P1) but for the 'Cathedral Cove Carpark' (P2). The former is indeed much closer to the bay, but parking there is not allowed at night. Therefore, we tried our luck at the slightly more distant private parking lot, which can be used for 10 NZD. Here, too, the entrance/exit is closed at night, so we asked the owner over the phone if it would be possible to leave the parking lot a bit later. That was no problem at all, and he didn't lock up the fence that evening. (And no, we weren't robbed in the meantime ;P). The path from the parking lot to the bay is easy to find and merges with the actual path after about 15 minutes. After another 5 minutes, you reach the bay. For the return journey in darkness, as always, a headlamp or similar is essential.

About half an hour before sunset, we reached the bay to discover that it was definitely worth a visit and - that one should check the tides beforehand. Because it was high tide, unfortunately, we couldn't see 'The Hoho Rock' from the cave without getting wet. Nonetheless, the upside was that only a few people ventured into the bay for sunset, and we had the place almost to ourselves. After nightfall, as an alternative, we photographed the Milky Way under the palm trees. It was also very interesting here to see what happens at night. Besides some animals becoming active at night and hearing occasional glowing eyes and noises in the bushes, two teenagers became active with their own noises. Additionally, a small group of exchange students with two Kiwis (New Zealanders) arrived late at the bay. The group's plan was to camp on the beach in the bay and experience a beautiful sunrise the next morning. In any case, there was good conversation - mainly for Laura, whose motivations for nighttime outings are still limited. After a few minutes, the tide had receded enough that we could enter the cave quite far and could guess 'The Hoho Rock' in the darkness. Despite the still sometimes very high waves and the short path through knee-high water, I risked a salty water-soaked camera to cross to the other side and capture bits of the Milky Way. In a few minutes, it would disappear behind the forest of the bay. Although a cool composition was somewhat difficult, a wonderful interactive 360-degree panorama was possible.
The Cathedral Cove at night

Click to open image
Startrails over the magical Cathedral Cove

Click to open image
The Cathedral Cove - A unmissable destination when you are in Coromandel, New Zealand

Click to open image
Mount Taranaki - The camera stays behind
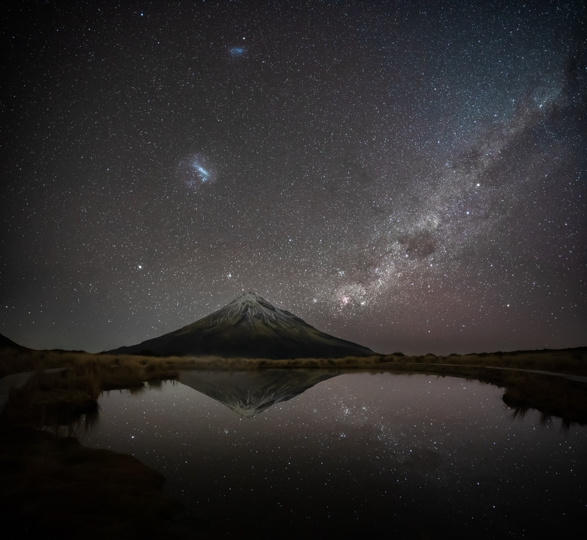
Mount Taranaki, also known as Mount Egmont, is a prominent landmark on the North Island of New Zealand. With a height of 2,518 meters, the cone-shaped volcano is an impressive sight and a popular destination. The mountain is surrounded by a national park that offers a variety of activities such as hiking, mountaineering, skiing, and camping. One of the most famous hikes is the Pouakai Circuit, which offers breathtaking views of the mountain and the surrounding landscape. Likewise, the hike passes by the famous reflection tarn, which reflects the snow-covered peak of the mountain when the weather is calm. Mount Taranaki is not only scenic but also culturally significant for the Māori, the indigenous people of New Zealand. The mountain is an important part of their mythology and is often revered as an ancestral spirit.
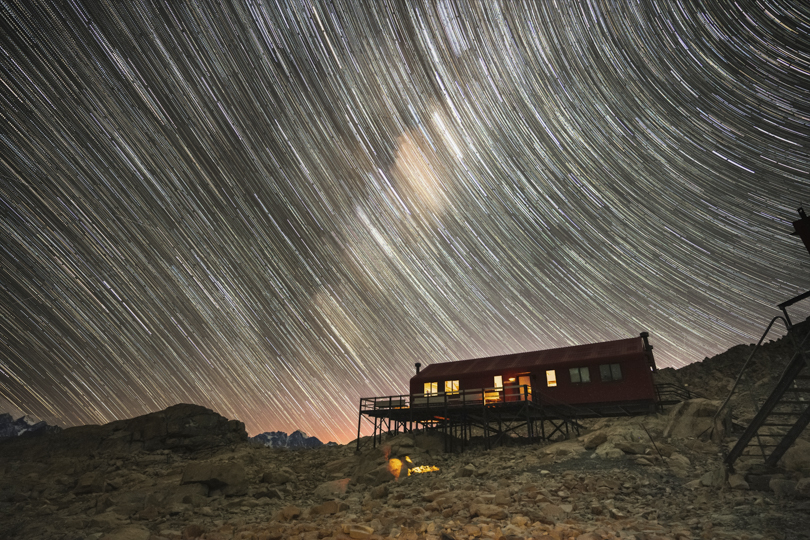
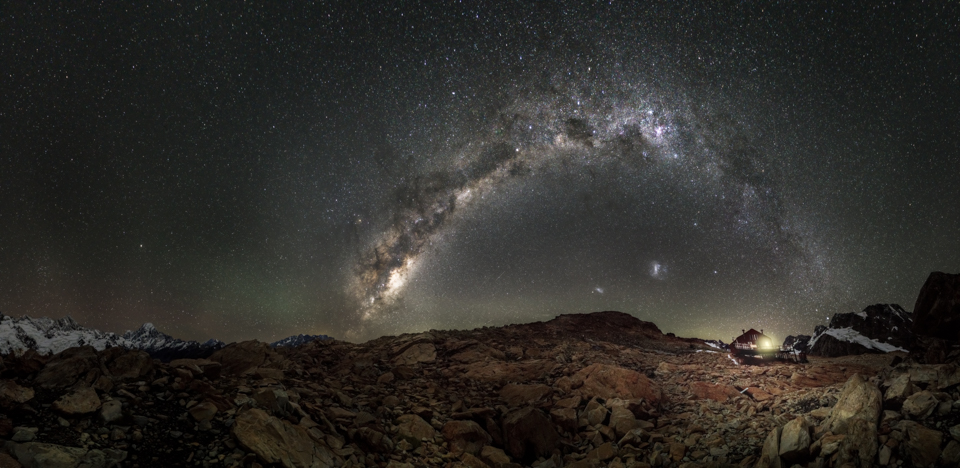
The inactive volcano had already secured a top spot on our 'must-see' list during our preparations in Europe. So, when October 2022 finally arrived, we were overwhelmed with excitement as we found ourselves in the area surrounding the volcano. Our plan was to capture photographs of the Milky Way (or parts of it) at the famous reflection tarn with the mountain in the background. Naturally, a nighttime mountain excursion on the other side of the world requires a bit more planning than usual. We needed to find out if there were any huts available for overnight stays, if it was safe to descend again, and where do we park the camper? These are important questions that needed to be addressed.
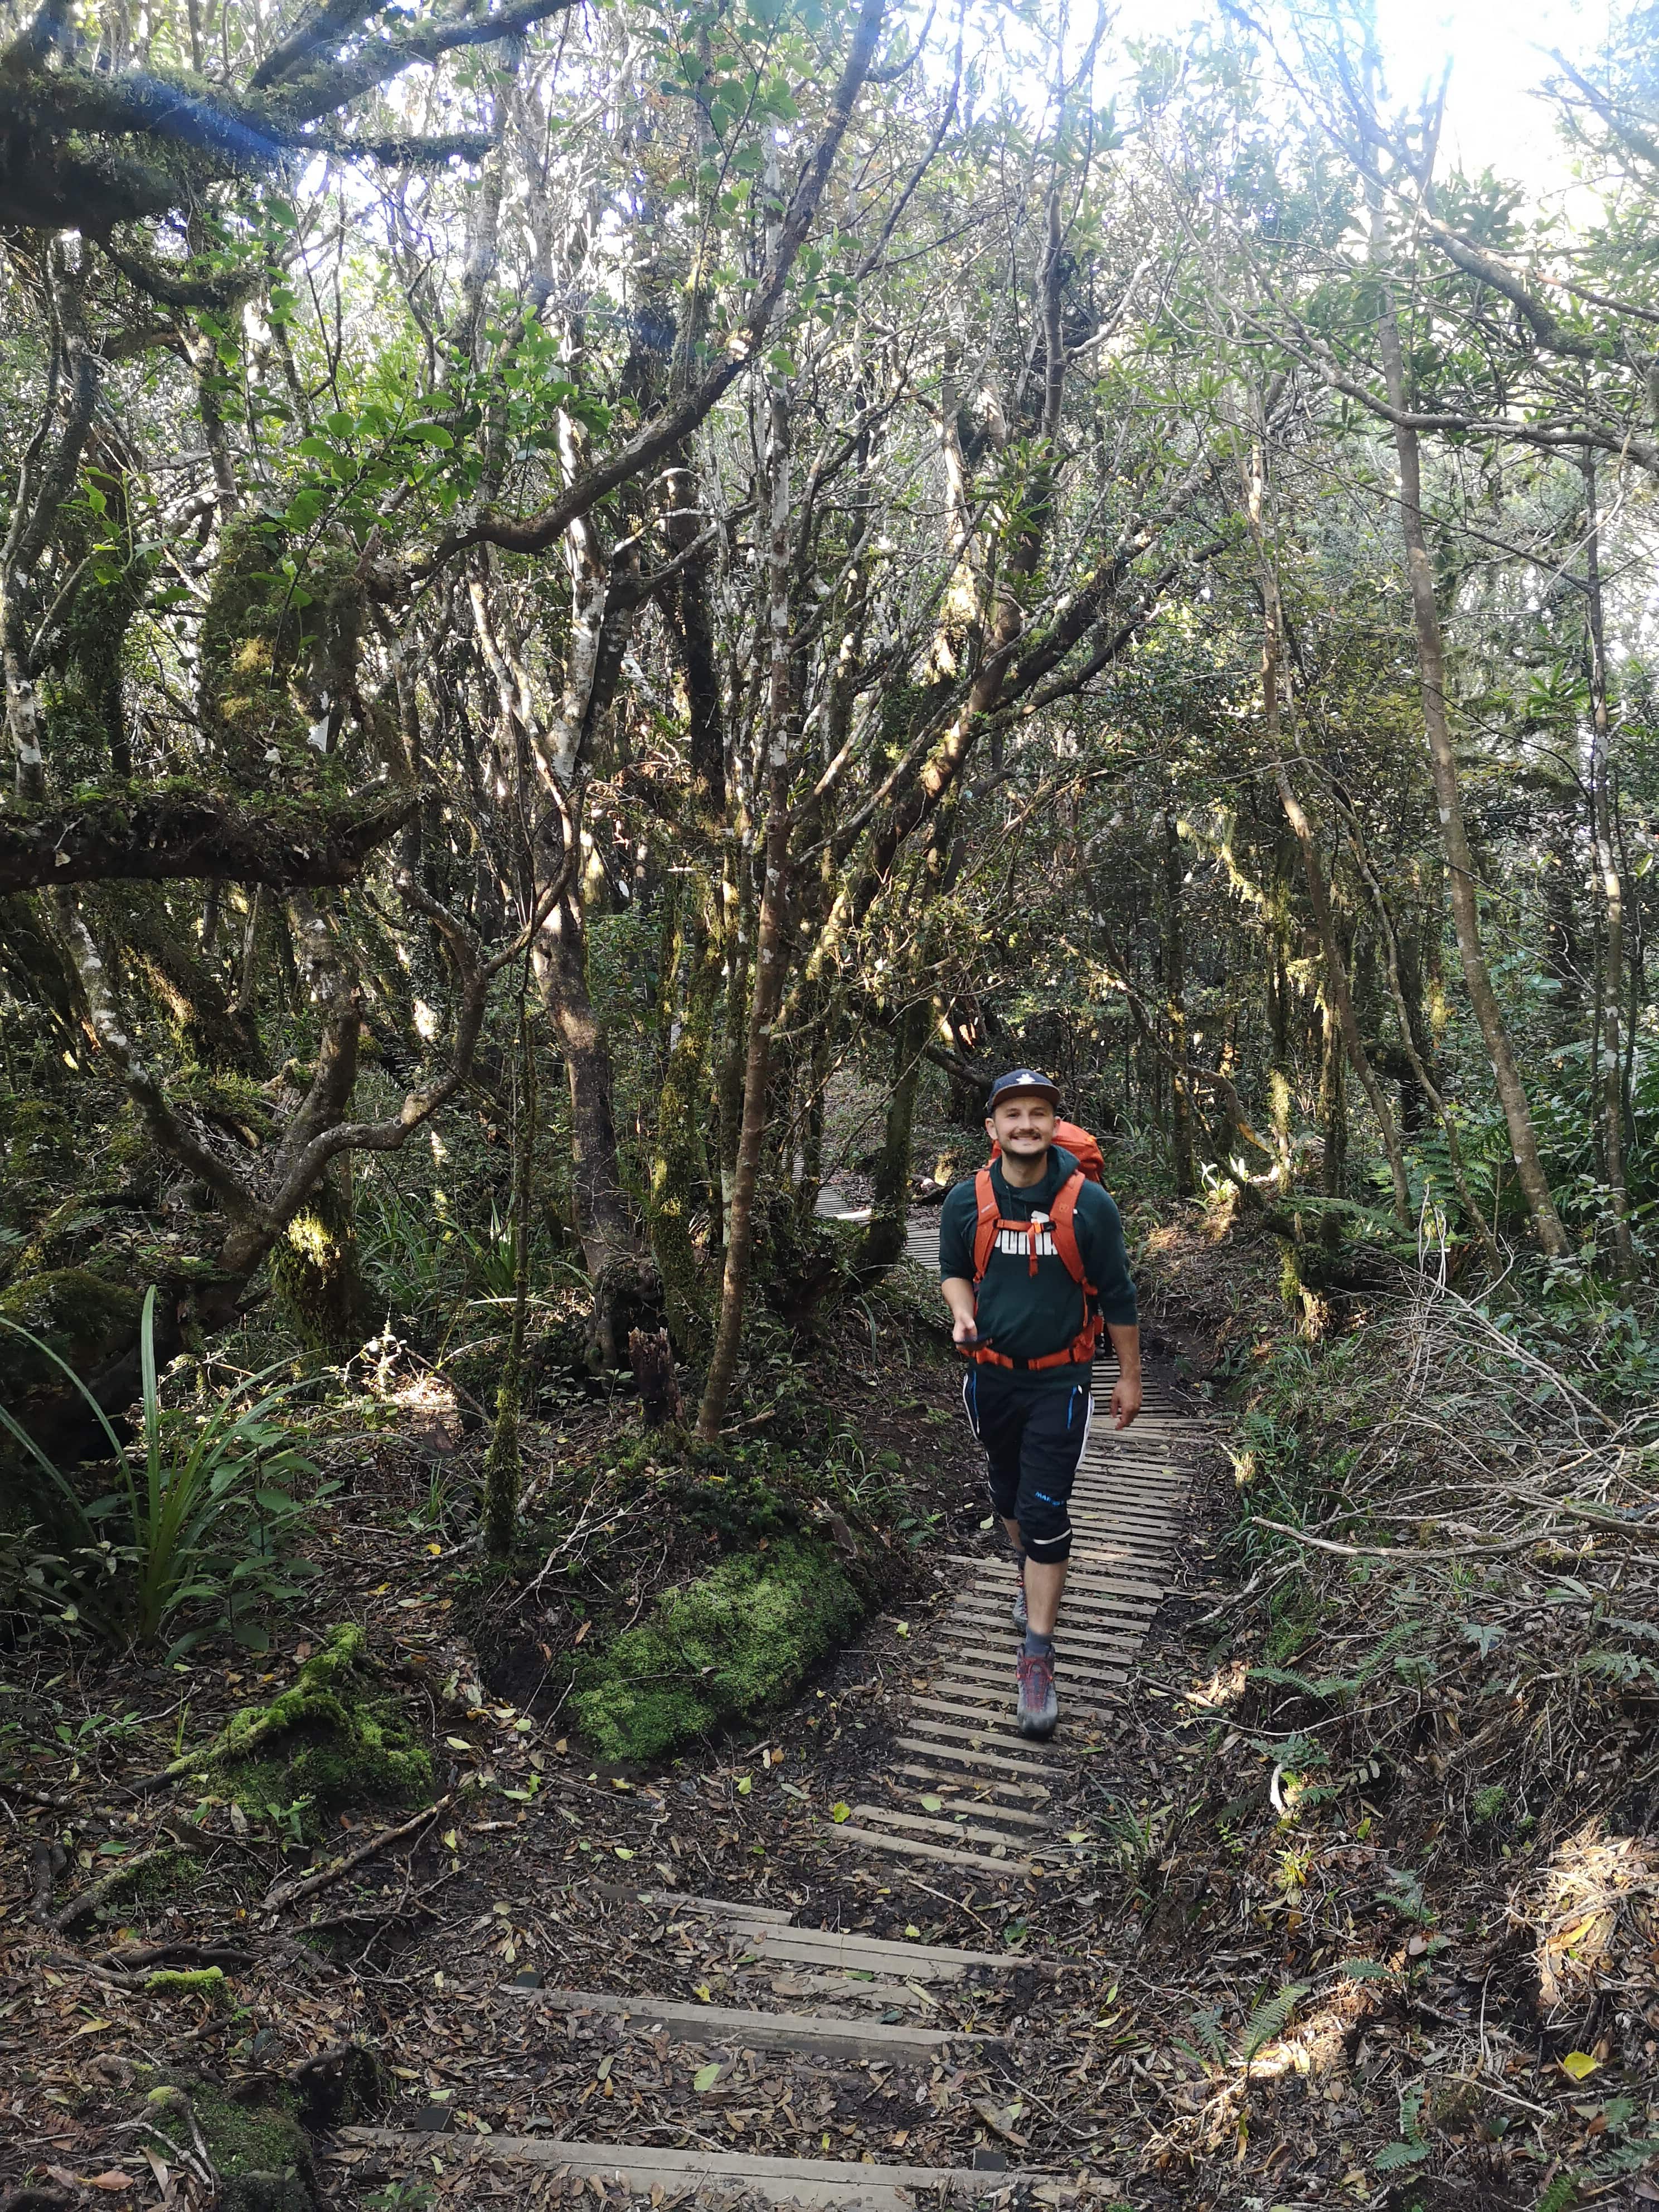

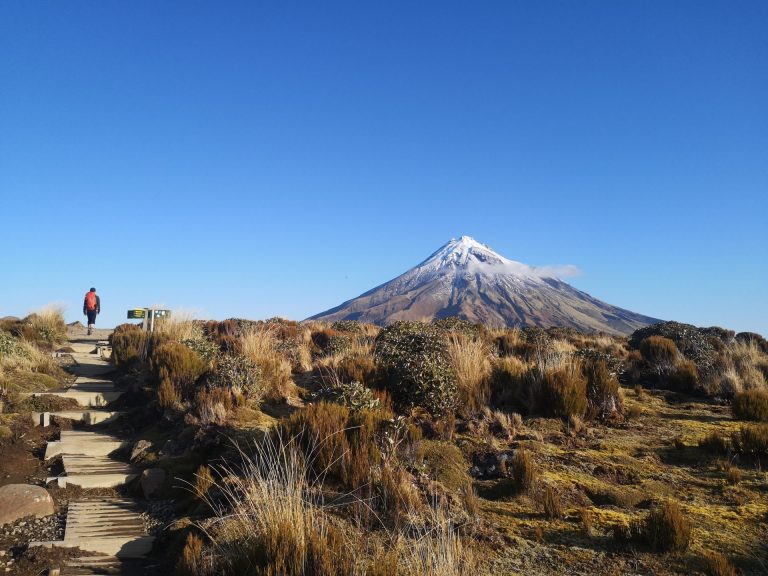
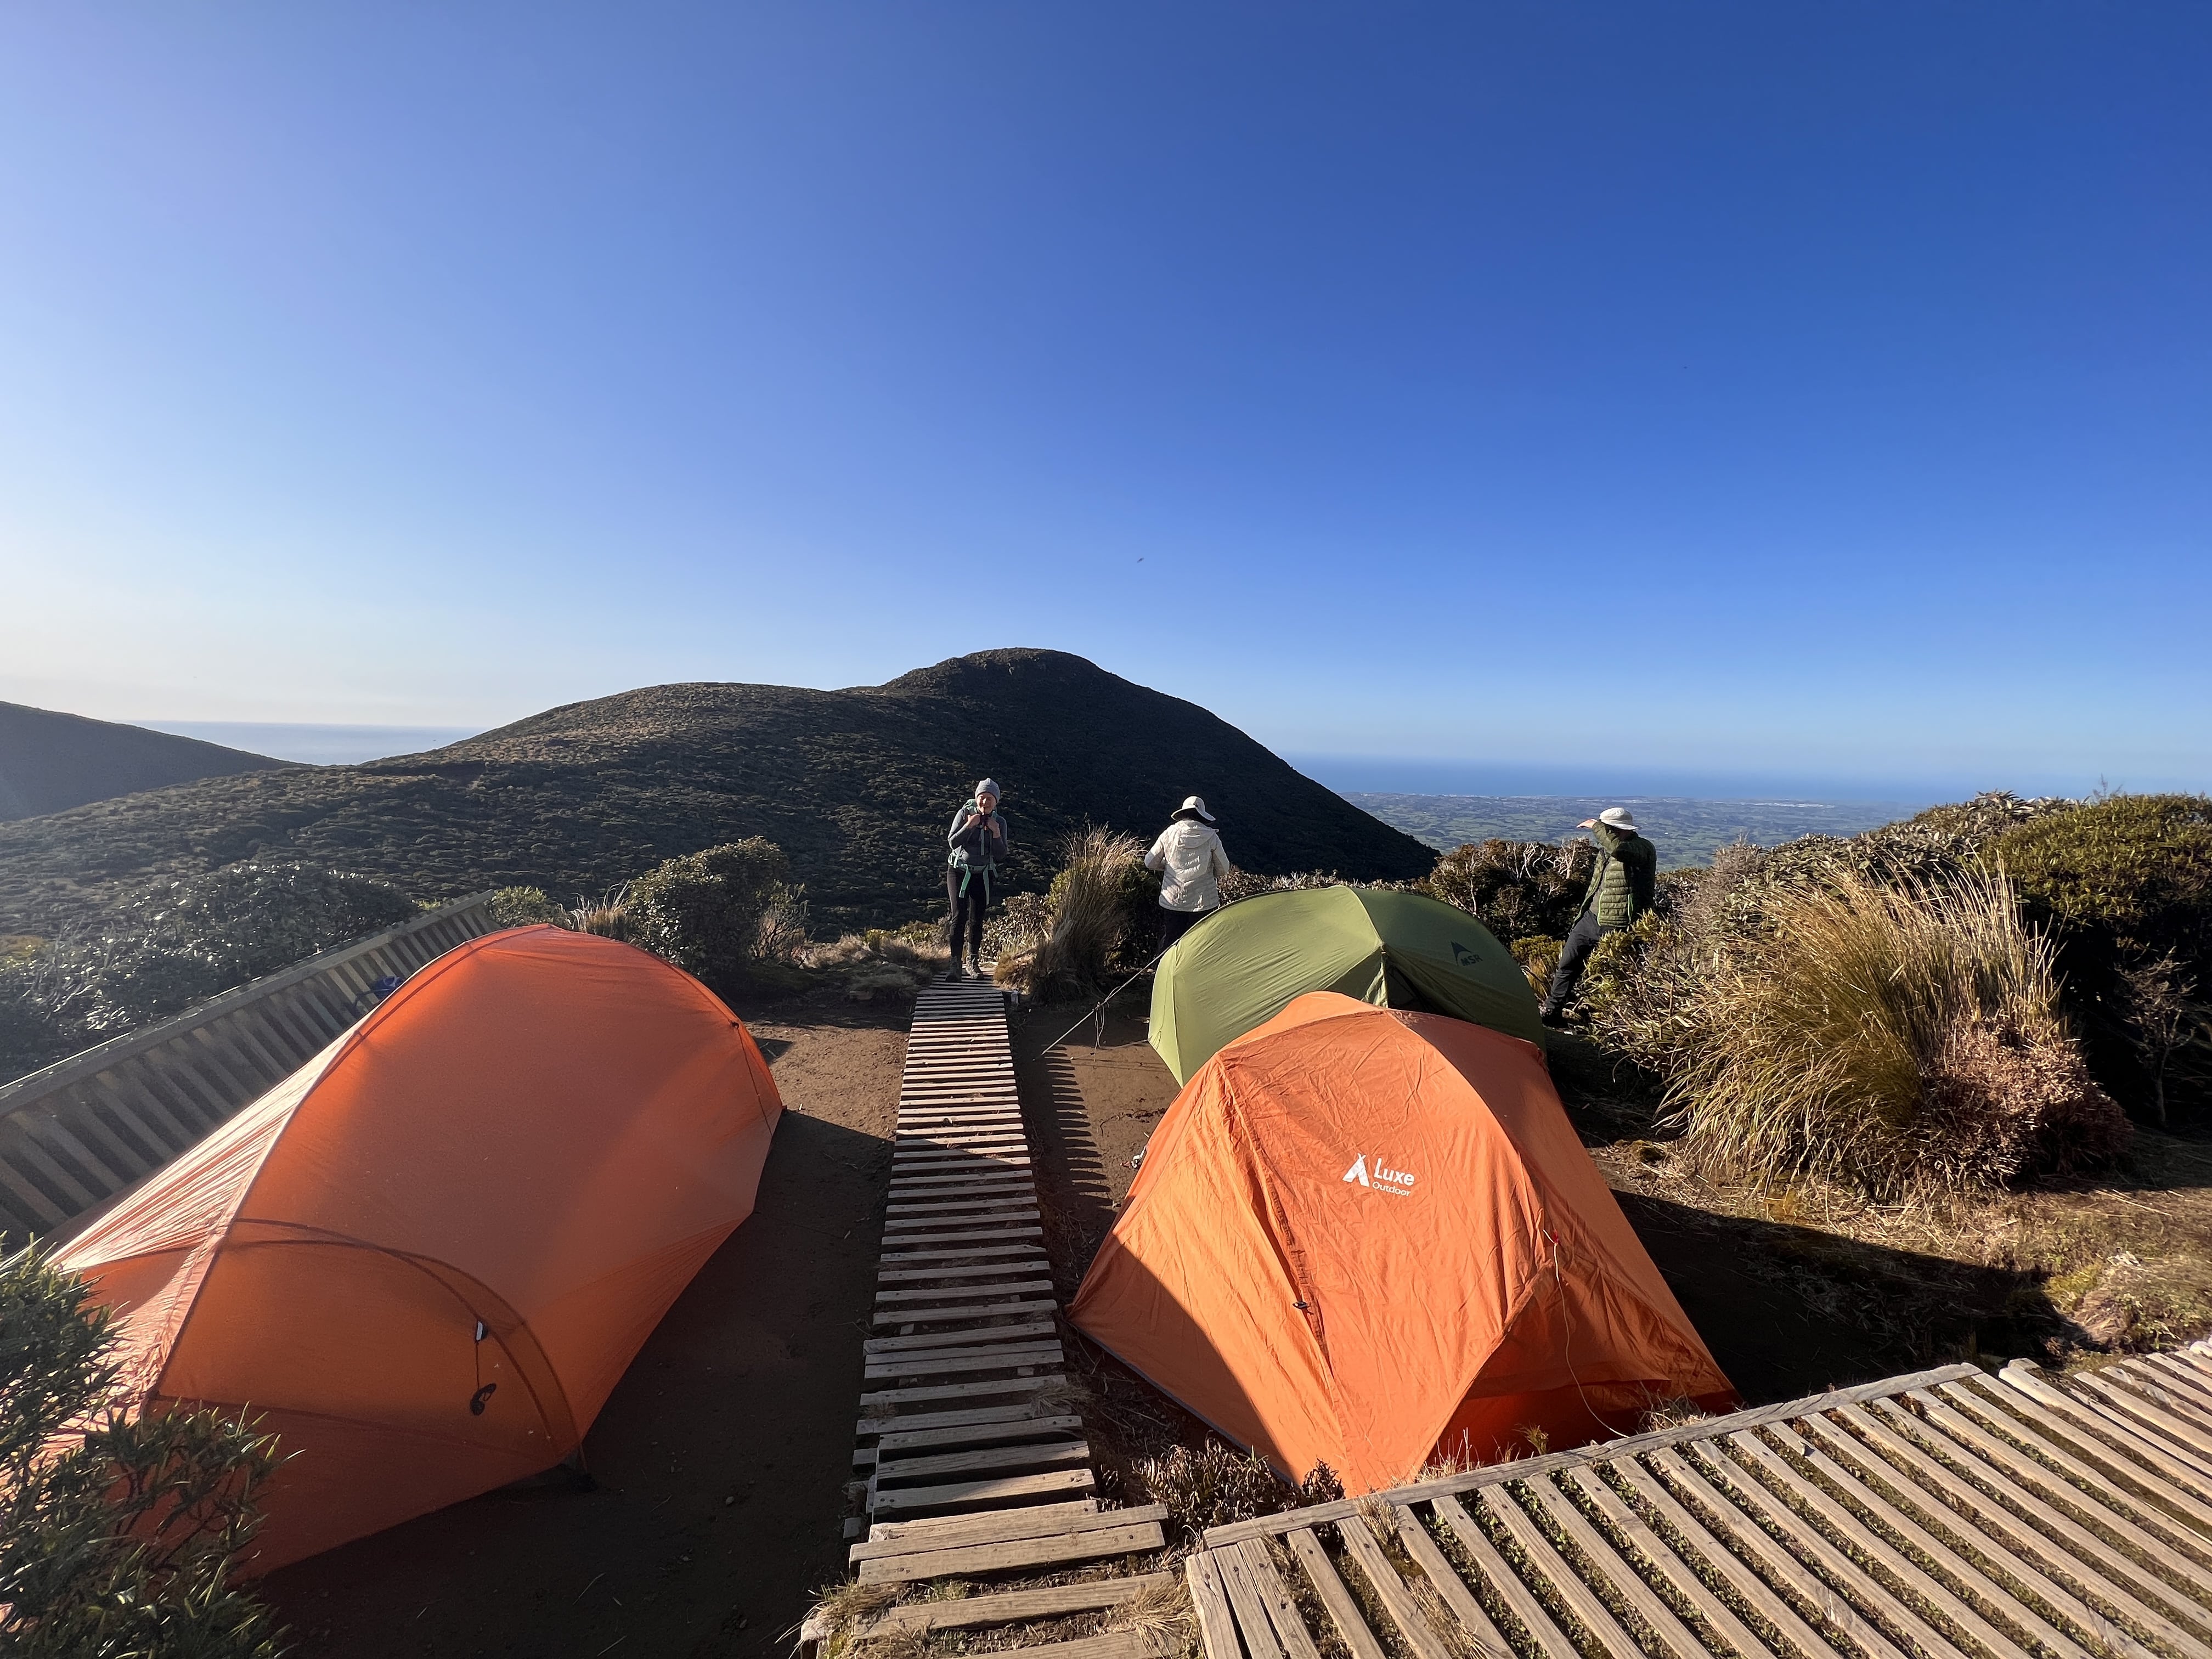
There is a hut situated very close to the reflection tarn. However, due to its popularity, we were unable to secure a spot in the hut, especially since we planned our ascent on short notice on a sunny day. We found that there were 3 to 5 campsites in front of the hut that could be used for camping, but they were filling up quickly, and we did not have a tent either. Therefore, we decided that a nighttime descent would be the only viable option. We packed our headlamps, equipment, and jackets for the night and set off from the 'Mangorei Track Trailhead' parking lot three hours before sunset. We quickly realized that a nighttime descent would not be a problem since the entire trail was equipped with a wooden walkway, complete with anti-slip mats. We arrived at the hut, where several other tourists were already bustling about. The campsites in front of the hut were also more than well-used. After another 20 minutes, we reached the reflection tarn perfectly before sunset. At the reflection tarn itself it was quite crowded too. Although this makes editing the time-lapse (mostly removing people) nerve-wracking, we also found some great entertainment. Moreover, we were not entirely alone after dark and met another backpacker from Germany and an Englishman who was also trying his hand at astrophotography.


After sunset and taking a few more photos, we set off downhill together. With our headlamps, the path was easy to find, and stumbling was unlikely. Will, the Englishman, had managed to secure a spot in the hut and only accompanied us as far as the hut. He actually left his relatively new camera at reflection tarn because his plan was to capture a time-lapse of the entire night. As he later informed us, the camera was still in the same place the next morning despite another rush to the lake. However, the camera's battery didn't last long, and what was planned to be an 8-hour time-lapse turned into a 30-minute one.
A sunset Timelapse in the Egmont National Park
Click to open video
M O U N T . T A R A N A K I

Click to open image
Castlepoint - Two attempts
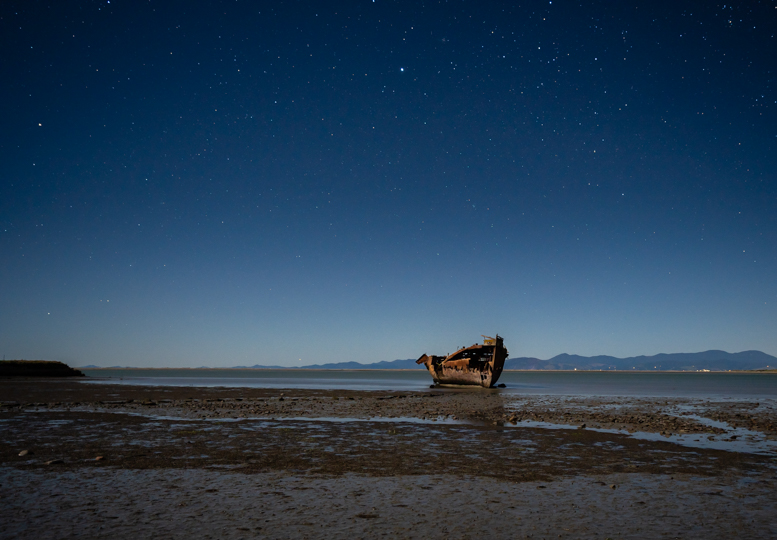
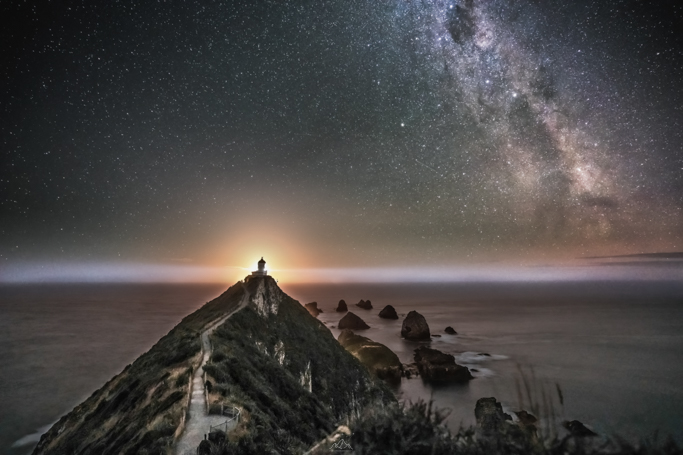
Castlepoint is a picturesque coastal village on the east coast of the North Island of New Zealand. The place is known for its breathtaking natural beauty and distinctive rock formations. The characteristic landmarks of Castlepoint is the lighthouse and the majestic Castle Rock, an impressive limestone rock that towers high above the sea, providing a spectacular backdrop for the surroundings. Castlepoint is also a popular destination for outdoor activities such as swimming, surfing, fishing, and hiking.


We had come across Castlepoint in a magazine a few weeks before we embarked on our journey and were deeply impressed by it. As we drove along the stunning east coast of the North Island towards Wellington, we planned a brief detour to Castlepoint. Although it's about a 1.5-hour drive from the main route towards the coast, the trip is undoubtedly worth it. In Castlepoint itself, there is a free camping site, just like in many other places in New Zealand, or there is a commercial one that offers showers, hot water, and a decent kitchen. However, the free camping site is covered with a lot of sand, which is blown from the beach onto the parking areas by the wind. Often, the spots are so covered with sand that only limited spaces are available, or the area is closed altogether. We chose the free camping site as it was closer to the lighthouse, making the nightly tour shorter. However, while having dinner with some sand, it turned out that the weather wasn't going to improve, and a clear view of the starry sky wouldn't be possible. So, this time, only a short time-lapse of the sunset made sense...
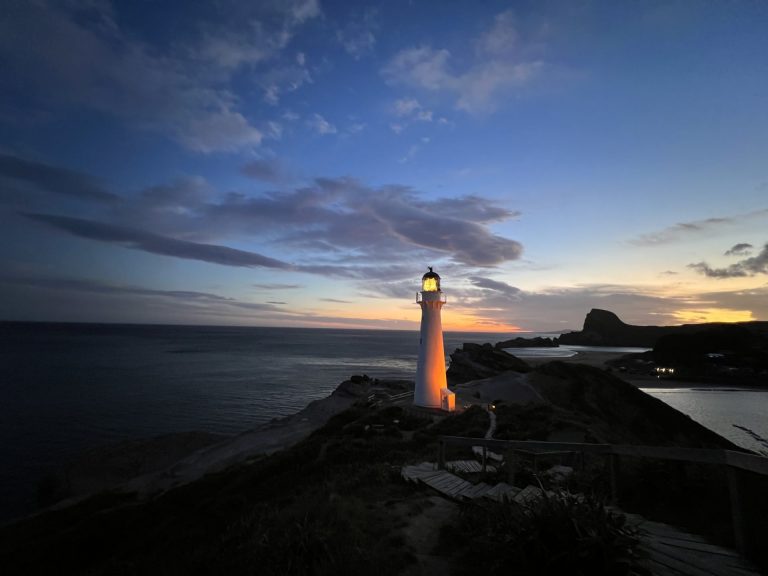
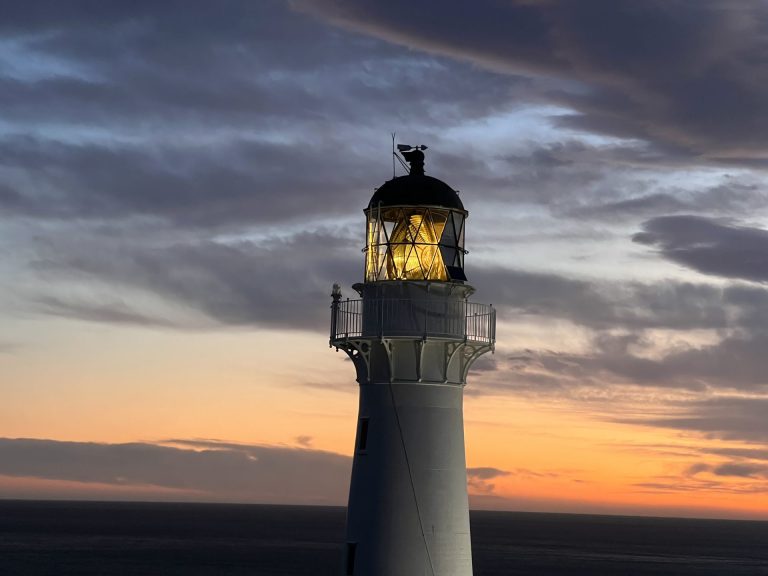

... six months later, we decided to give it another try. We had extensively explored the South Island and were slowly making our way back to Auckland, taking our time and occasionally taking detours. Upon arriving in Castlepoint, we found the same camping spot with just as much sand as before, but this time with slightly better weather. It wasn't until after dark that clouds rolled in, obscuring the view of the night sky. However, before that happened, I/we managed to capture some photos of the Milky Way above the lighthouse and the stunning coastal landscape in the darkness. P.S. Since the lighthouse is illuminated with different colors at night, achieving the right exposure for both the sky and the lighthouse itself is not very easy.
Sunrise at Castlepoint
Click to open video
Castlepoint - The famous lighthouse beneath the Milky Way

Click to open image
The Pinnacles - The overall highlight?!
The Putangirua Pinnacles, found near Cape Palliser on the coast of the Wairarapa region in the North Island of New Zealand, are a fascinating geological formation. These unique rock spires have been formed over millions of years of erosion and weathering of soft rock, protected by harder rock layers above. The Pinnacles stretch along the Putangirua Stream, creating an awe-inspiring backdrop that has been featured in films such as 'The Lord of the Rings: The Return of the King'. Visitors can explore the Putangirua Pinnacles via hiking trails that wind through the magnificent gorges and lush bush landscapes. This not only allows them to observe the fascinating geological formation up close but also to immerse themselves in the rich wildlife and plant life of the surroundings. Moreover, the Putangirua Pinnacles hold immense cultural significance for the Maori, the indigenous people of New Zealand. According to their beliefs, this site is tapu (sacred) and has several stories and legends associated with its formation.


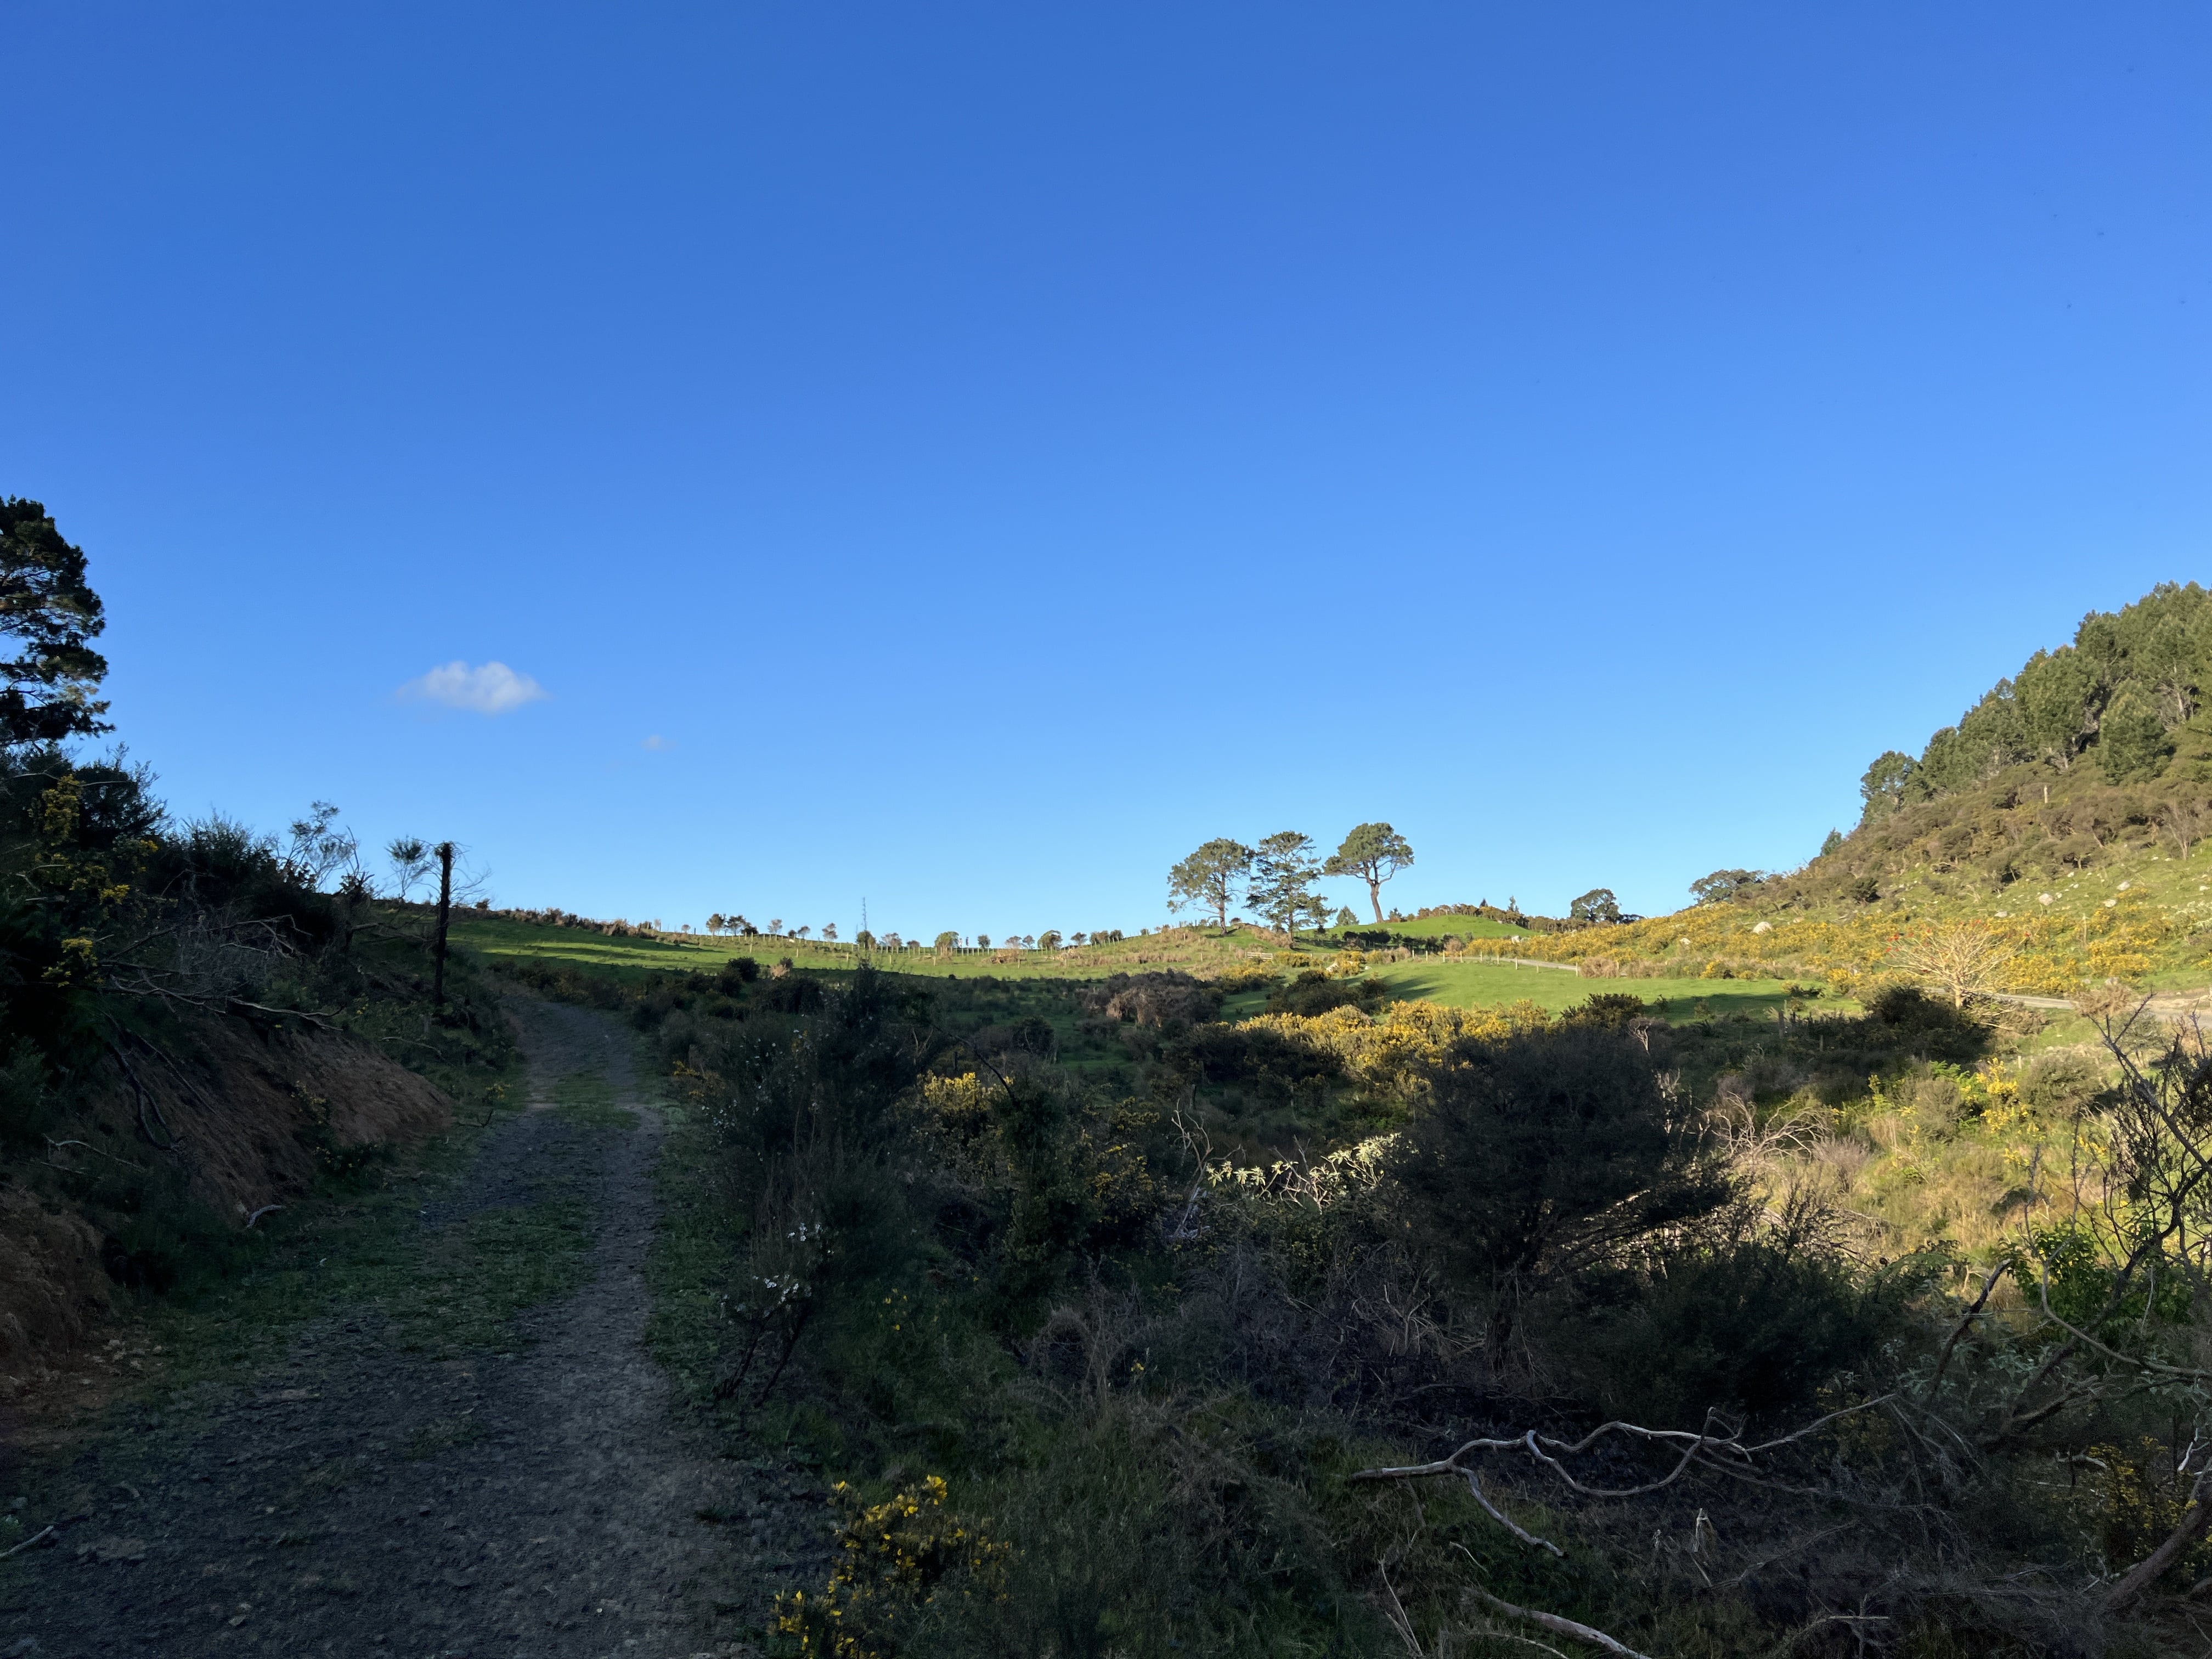
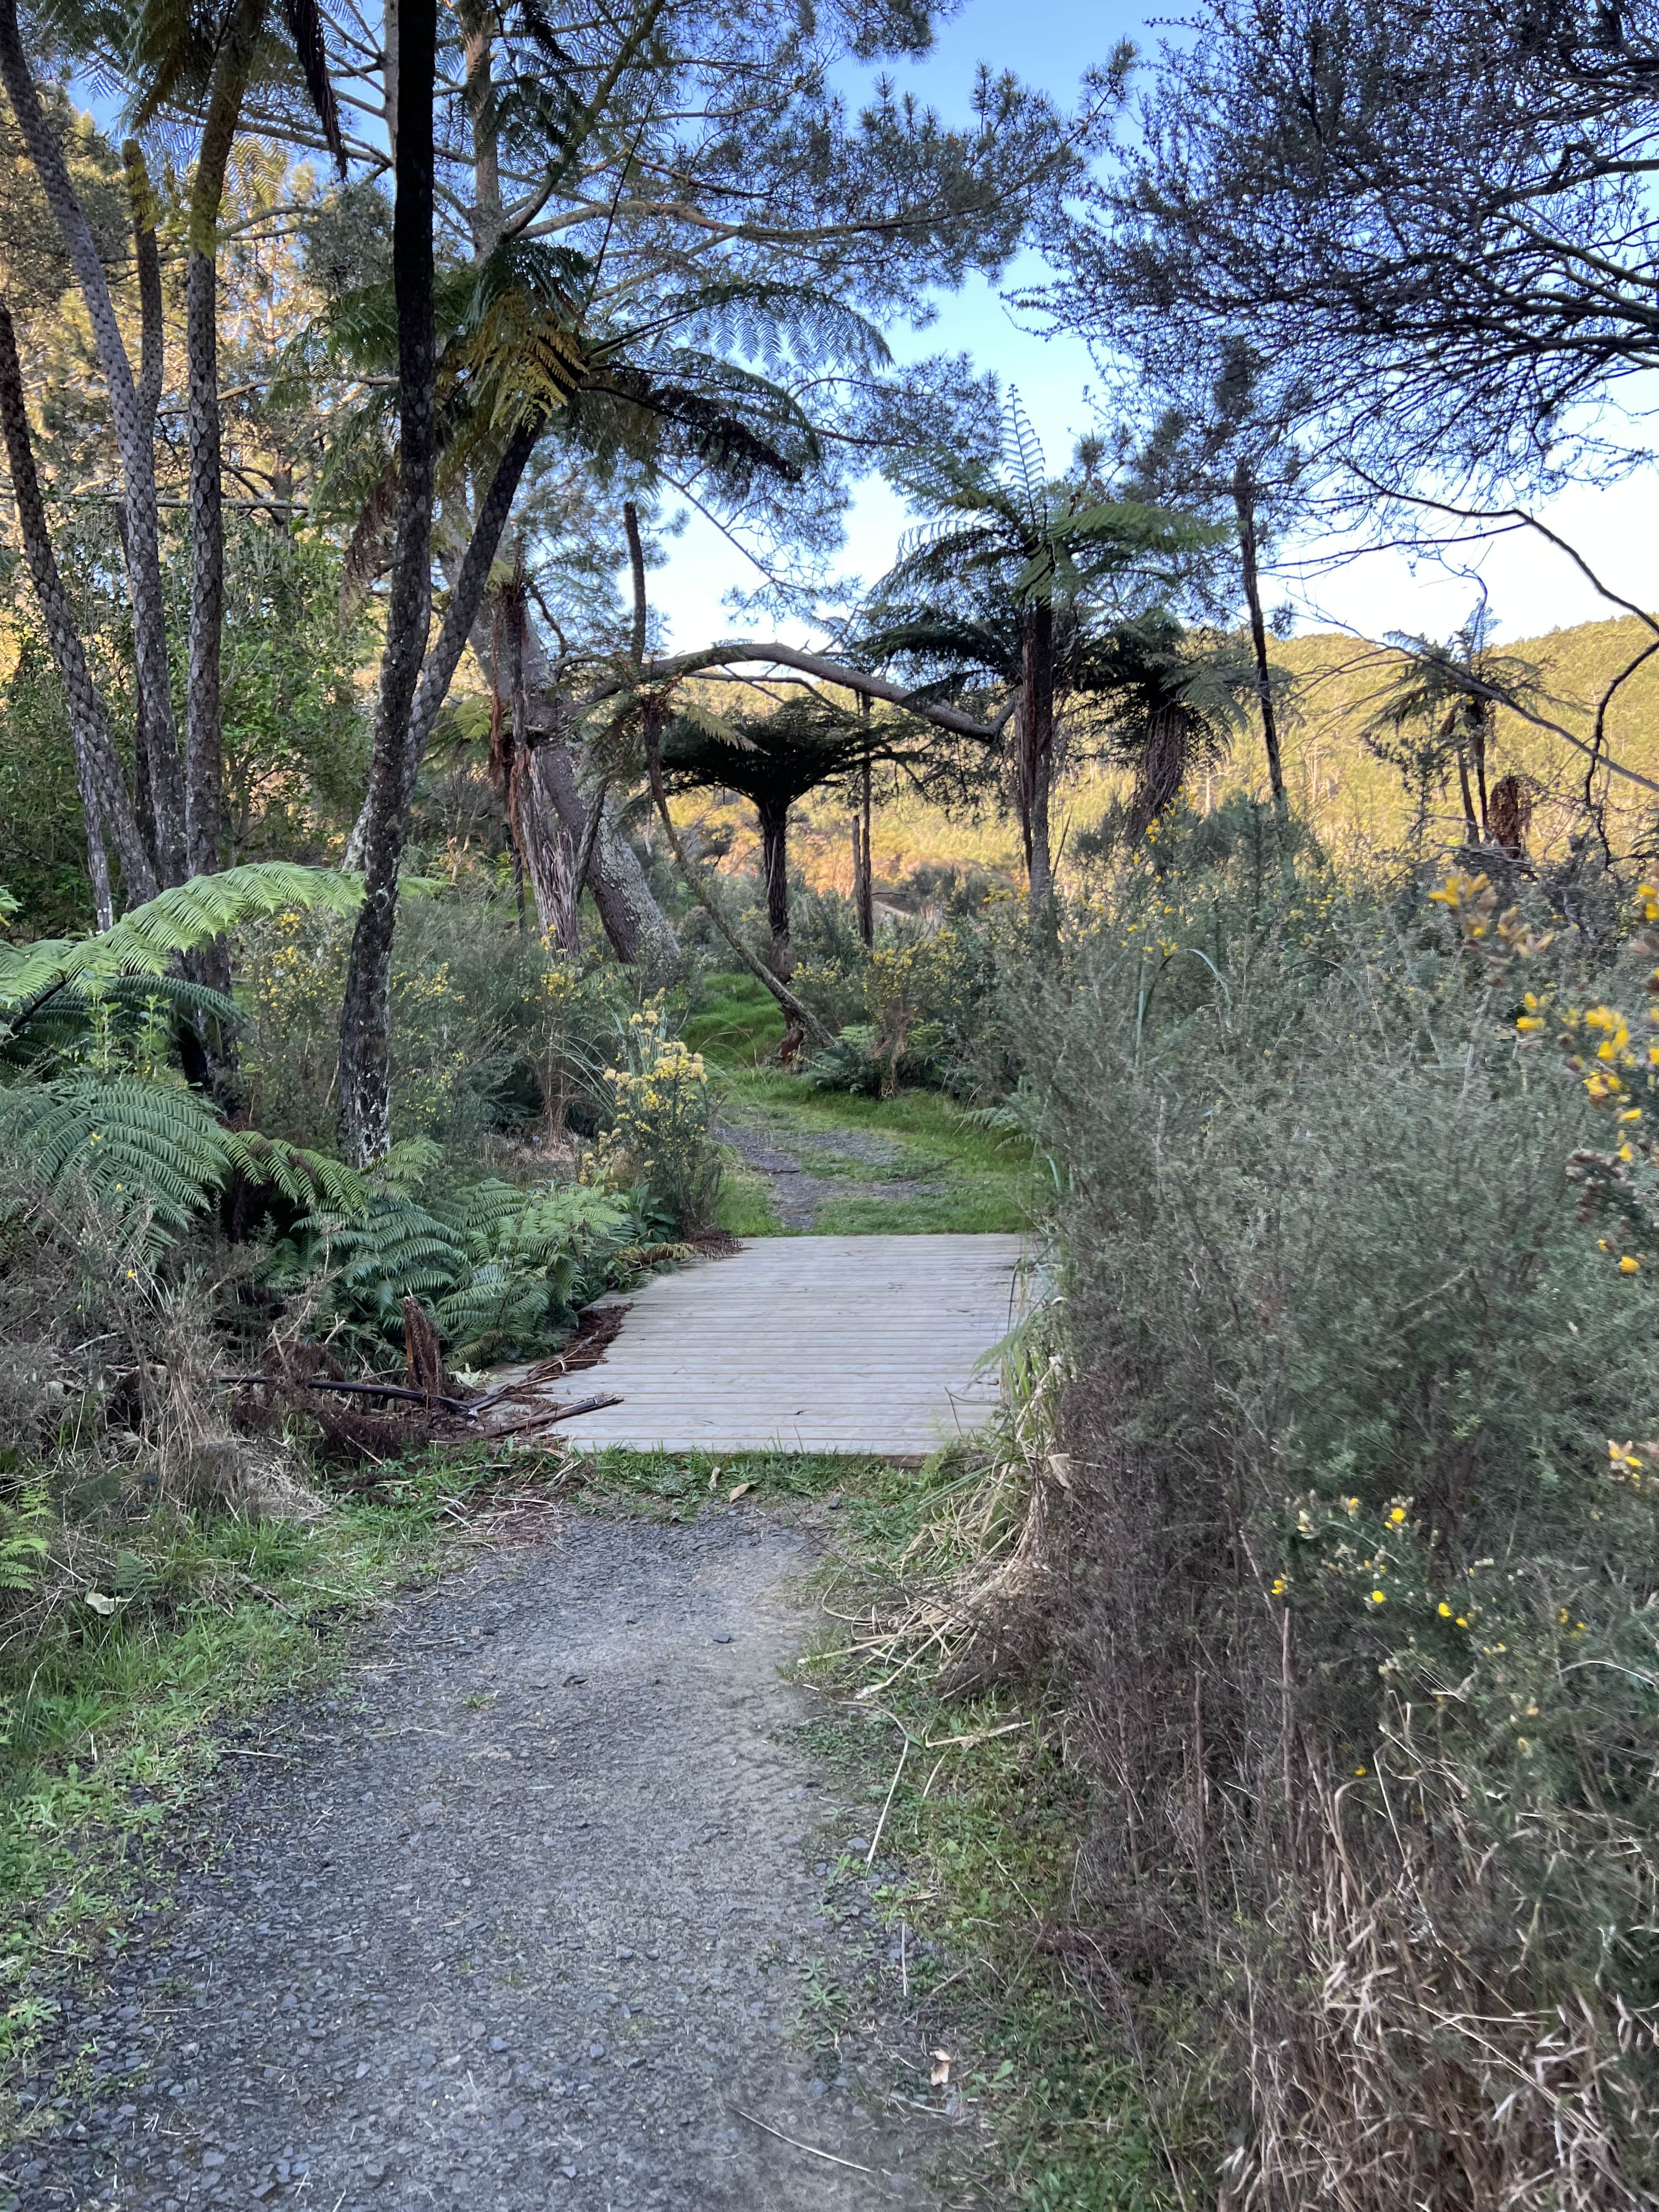
During our trip to New Zealand, we visited the Pinnacles twice. The first time was a spontaneous decision, and we didn't have many expectations. However, we quickly realized that this place is definitely worth a visit. We hiked along the trail and took a small detour to a viewpoint, where we enjoyed an overwhelming view from above. Later, we descended into the valley to see the rock formations. The landscape was surreal and magnificent to behold. It's no wonder that it's a popular filming location, just like the ones used in the Lord of the Rings. Unfortunately, during our first visit, we couldn't see the core of the Milky Way, and so we didn't have a photo of it in mind.
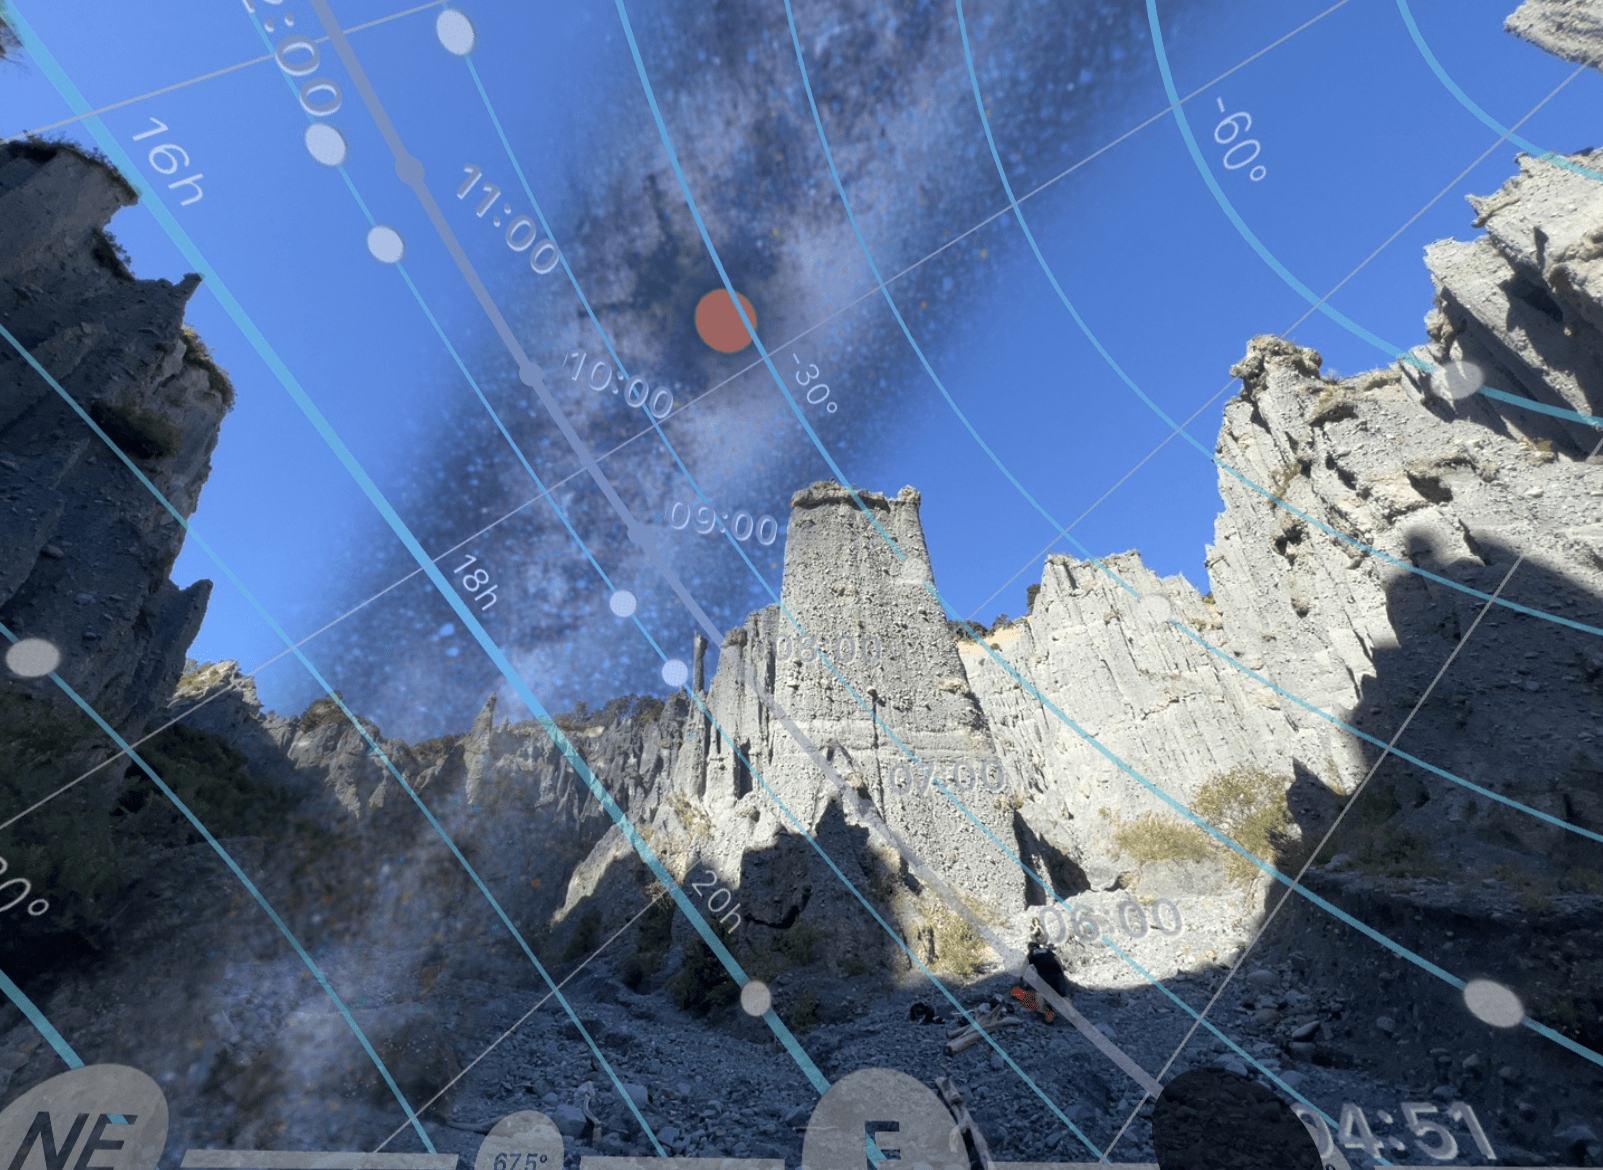

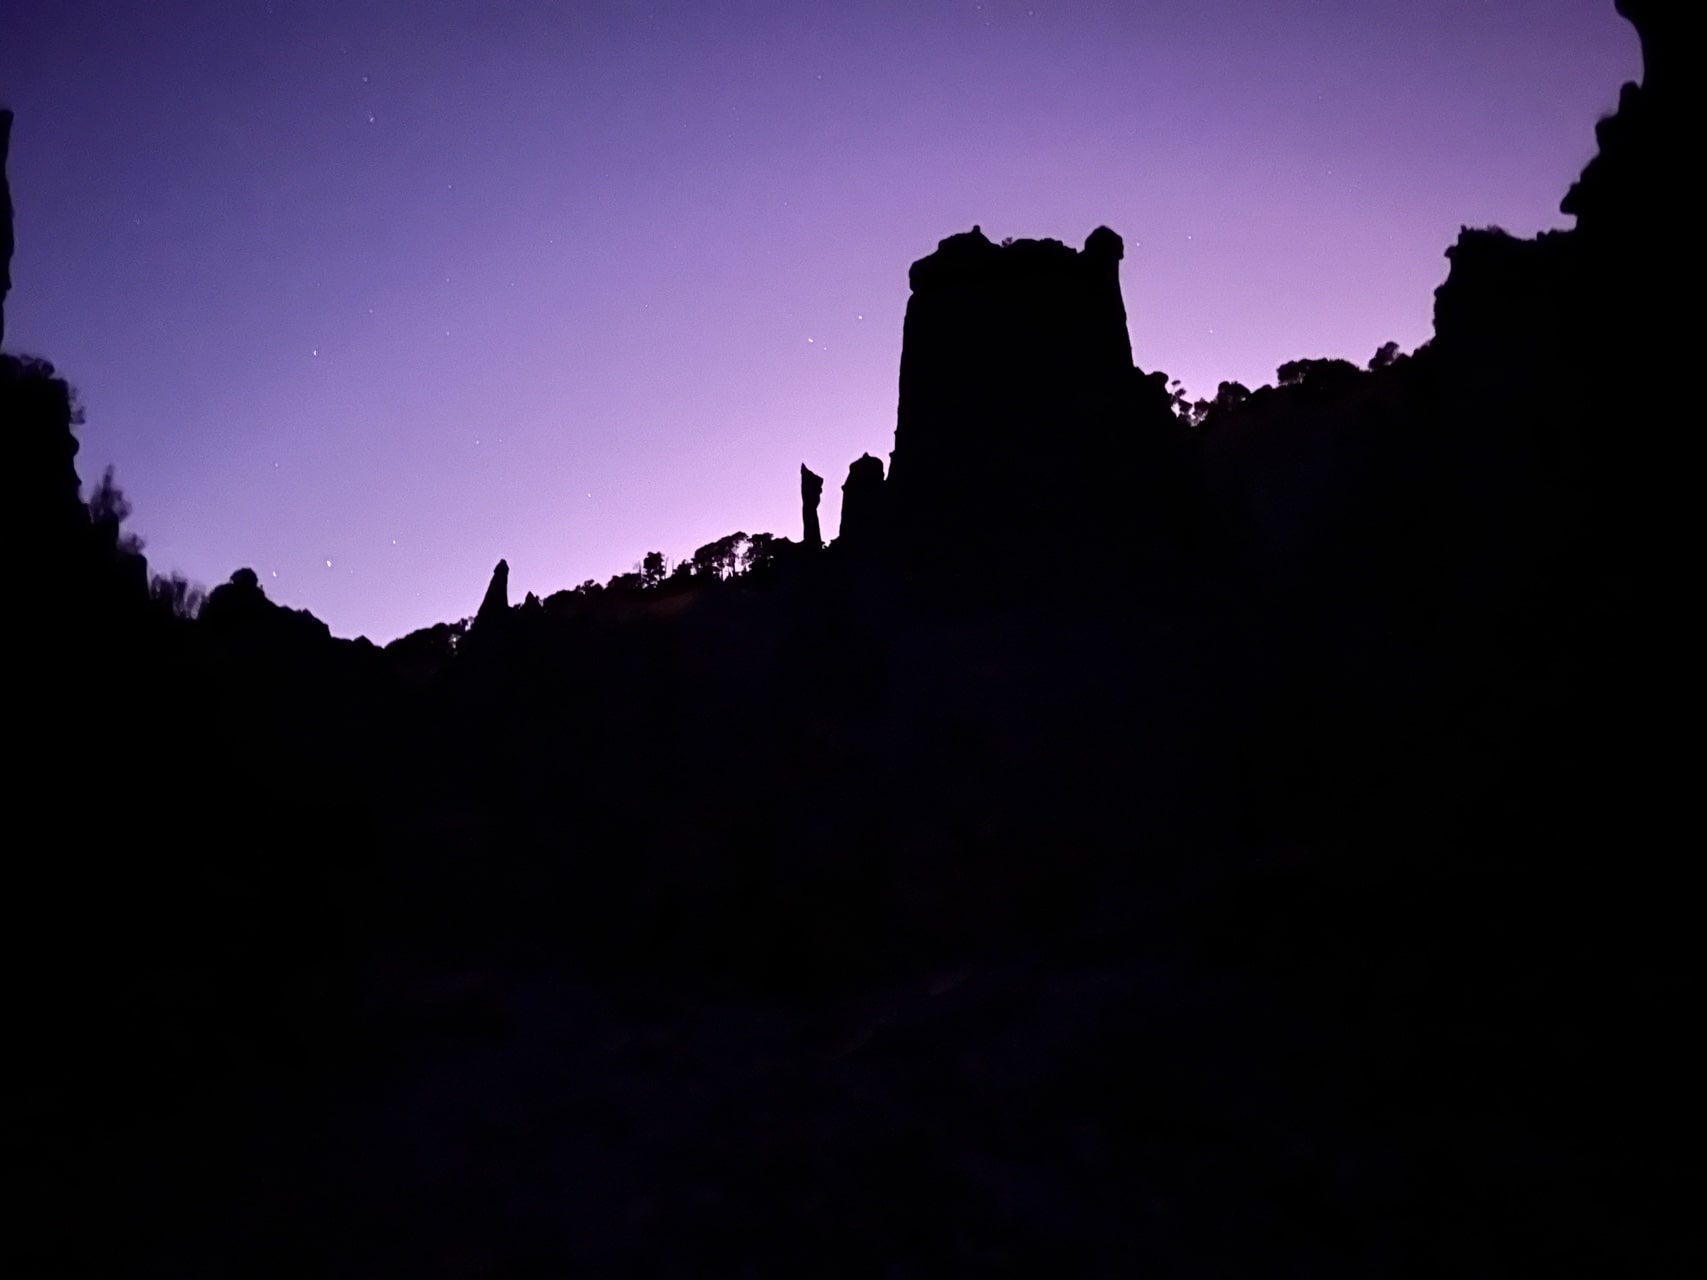
On our second visit, six months later and while heading back to Auckland, our goal was to capture a photo of the Milky Way at the amazing Pinnacles location. For this, we chose to utilize the campground located right at the beginning of the trail. Before sunset, Laura and I went on a hike to see the Pinnacles during daytime and to plan for the photo. We explored the hiking trail thoroughly, as it runs through a riverbed and has several branches, not all leading to the destination. I would have to walk it again in the darkness in a few hours, so we had to be well-prepared. Since in March, the Milky Way is visible at the Pinnacles late at night or shortly before sunrise, we needed to sleep after dinner at the campground. The alarm at around 3:00 a.m. was irritating, and I was tempted to stay in bed. However, I managed to motivate myself to find the path back to the Pinnacles in the darkness for about 30 minutes to attempt the planned panorama. Various animal noises, the many branches and passages, and the darkness itself convinced me that this place could certainly be used for horror movies as well. Finally, after a few changes in position, I found a suitable spot amidst the Pinnacles and took as many photos as possible until dawn (approximately 2 hours). This allowed me to combine a panorama of the night sky with a panorama at dawn in the end. Personally, I am very satisfied with the result, and I am even happier to have followed through with the plan that night instead of staying in bed.
The Pinnacles - Exploring the Paths of the Dead

Click to open image
